Installation with Visual Studio
3.1 CMake configuration with Visual Studio
3.1.1 Visual C++ Compilers
Visual Studio is cursed and uses nmake/msbuild as generators.
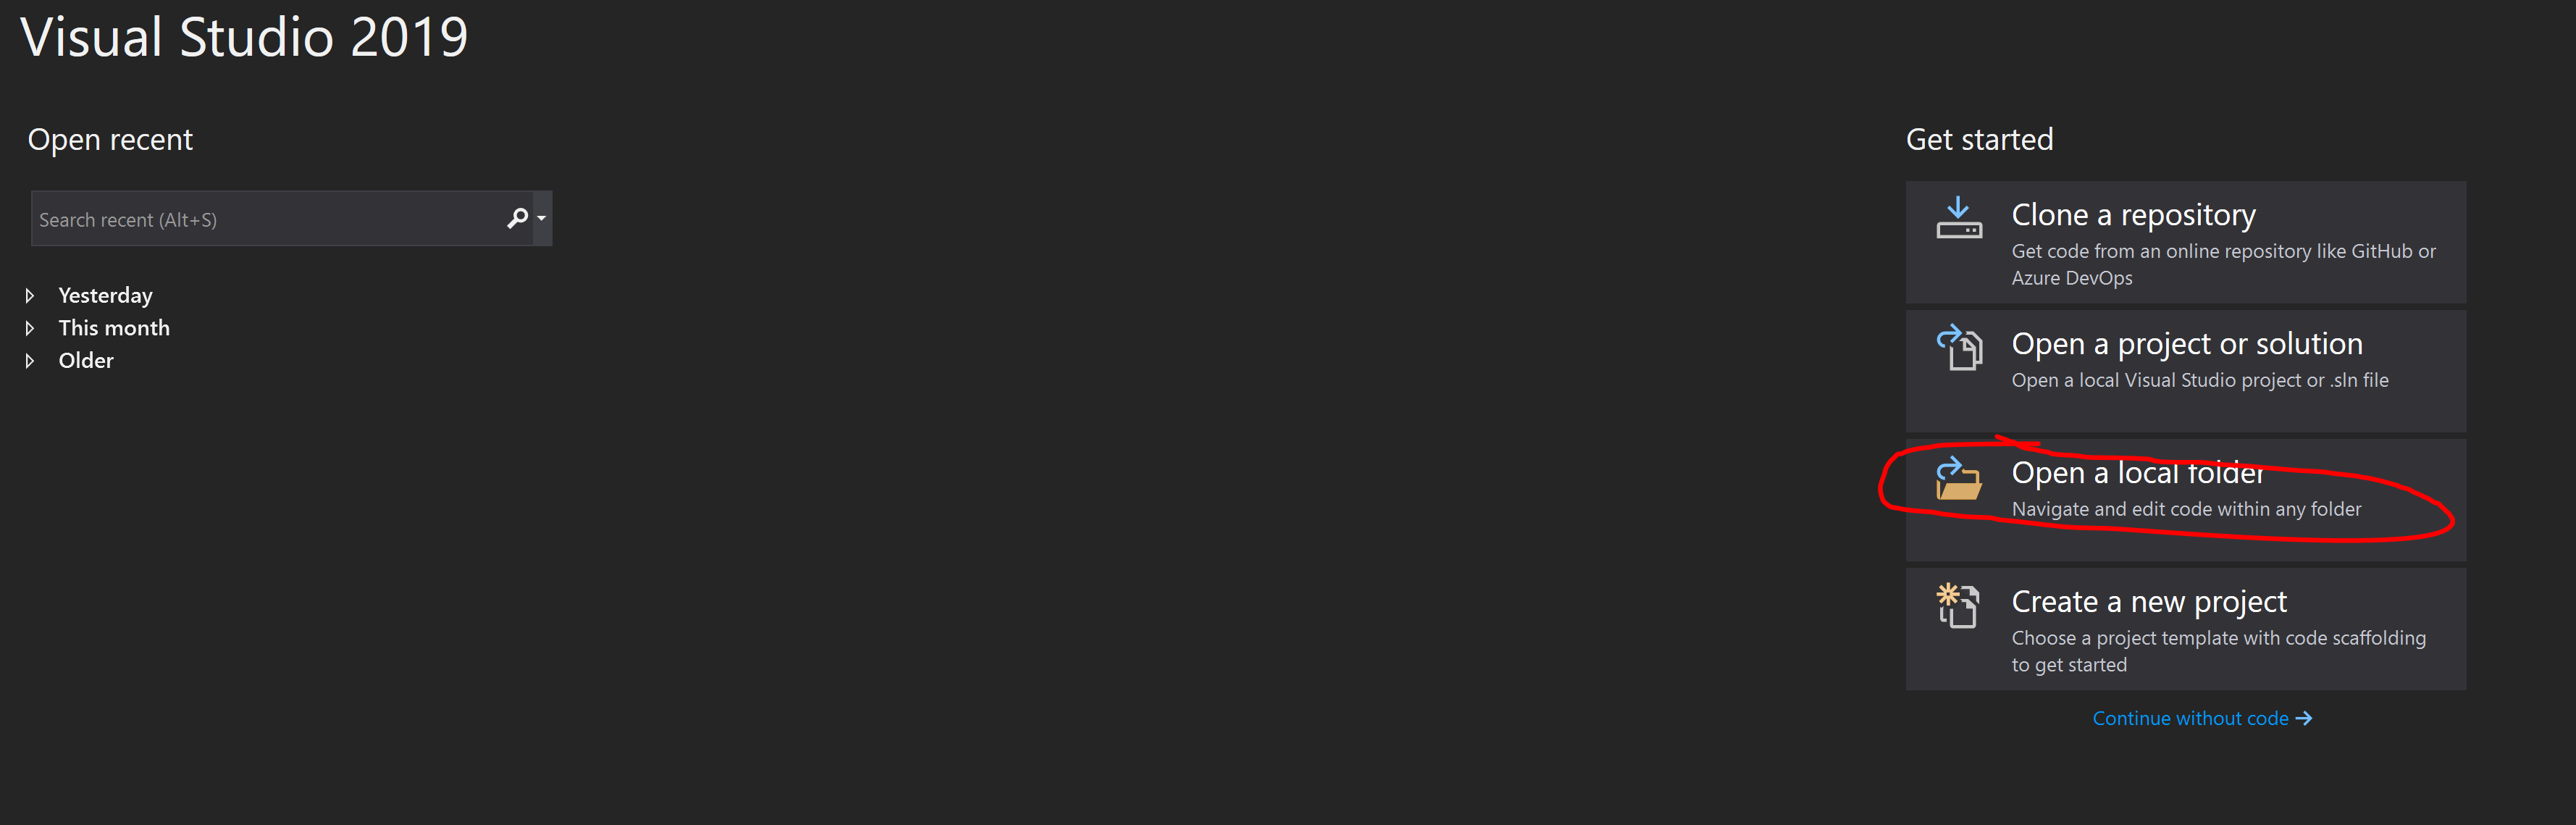
Start by opening the folder as a project.
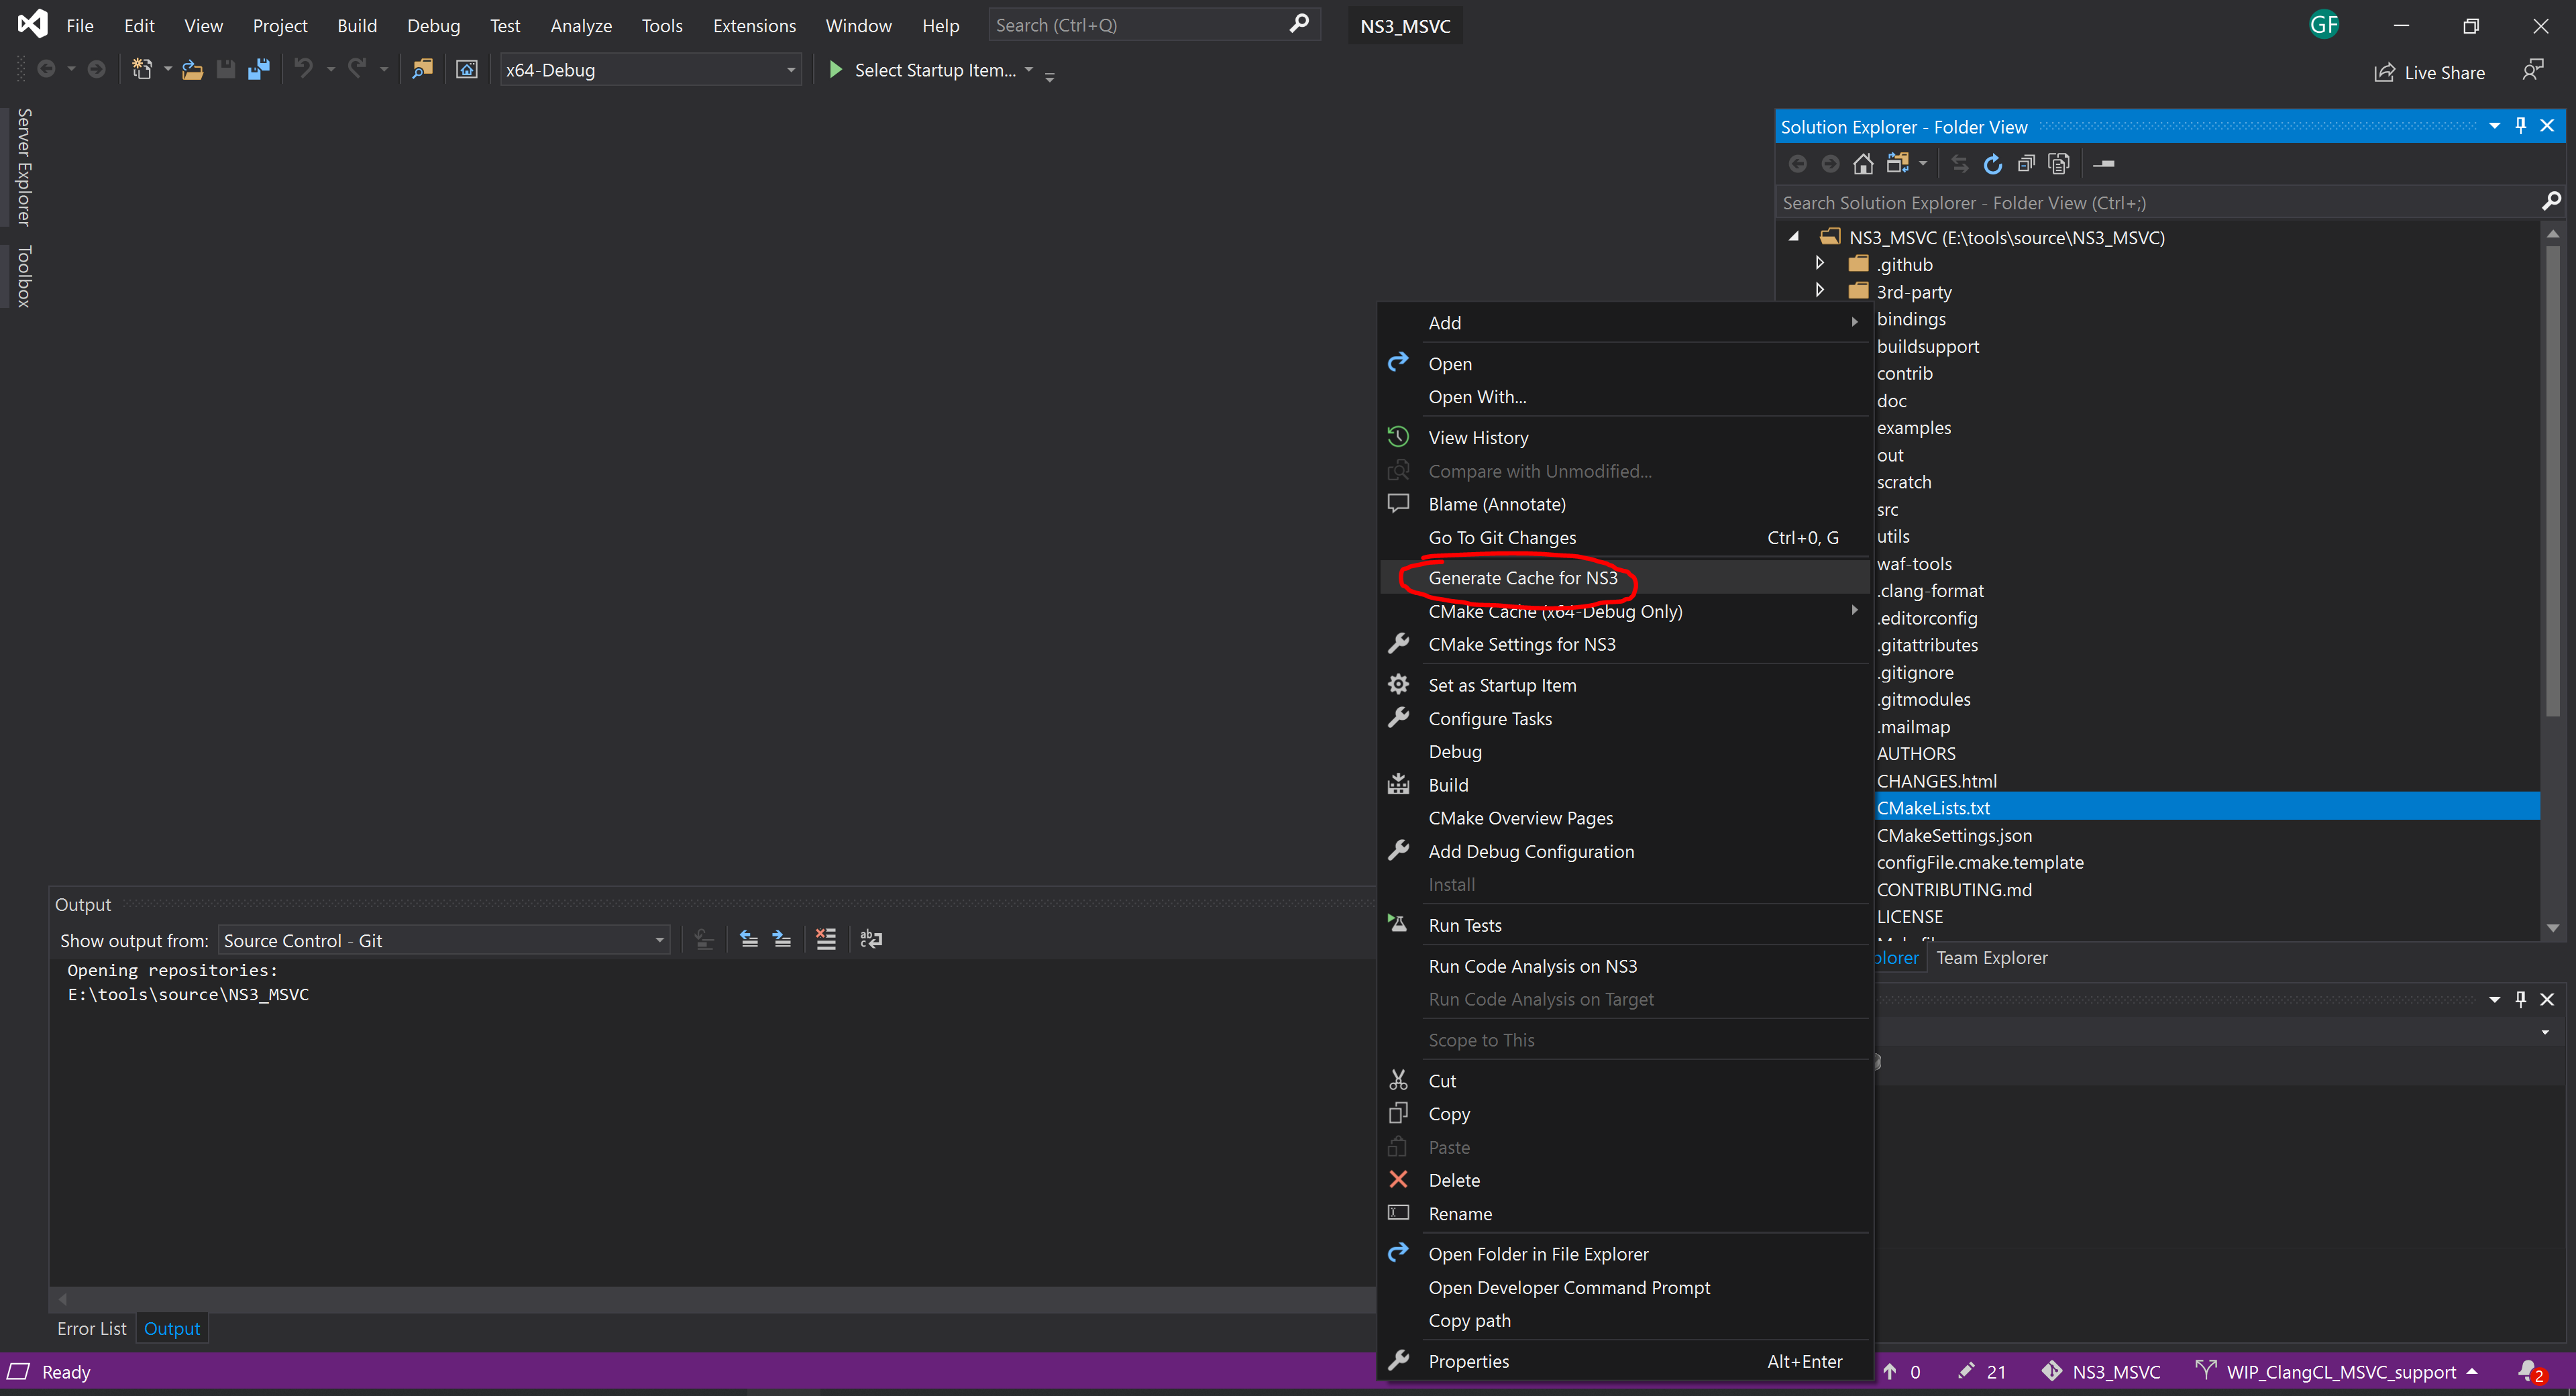
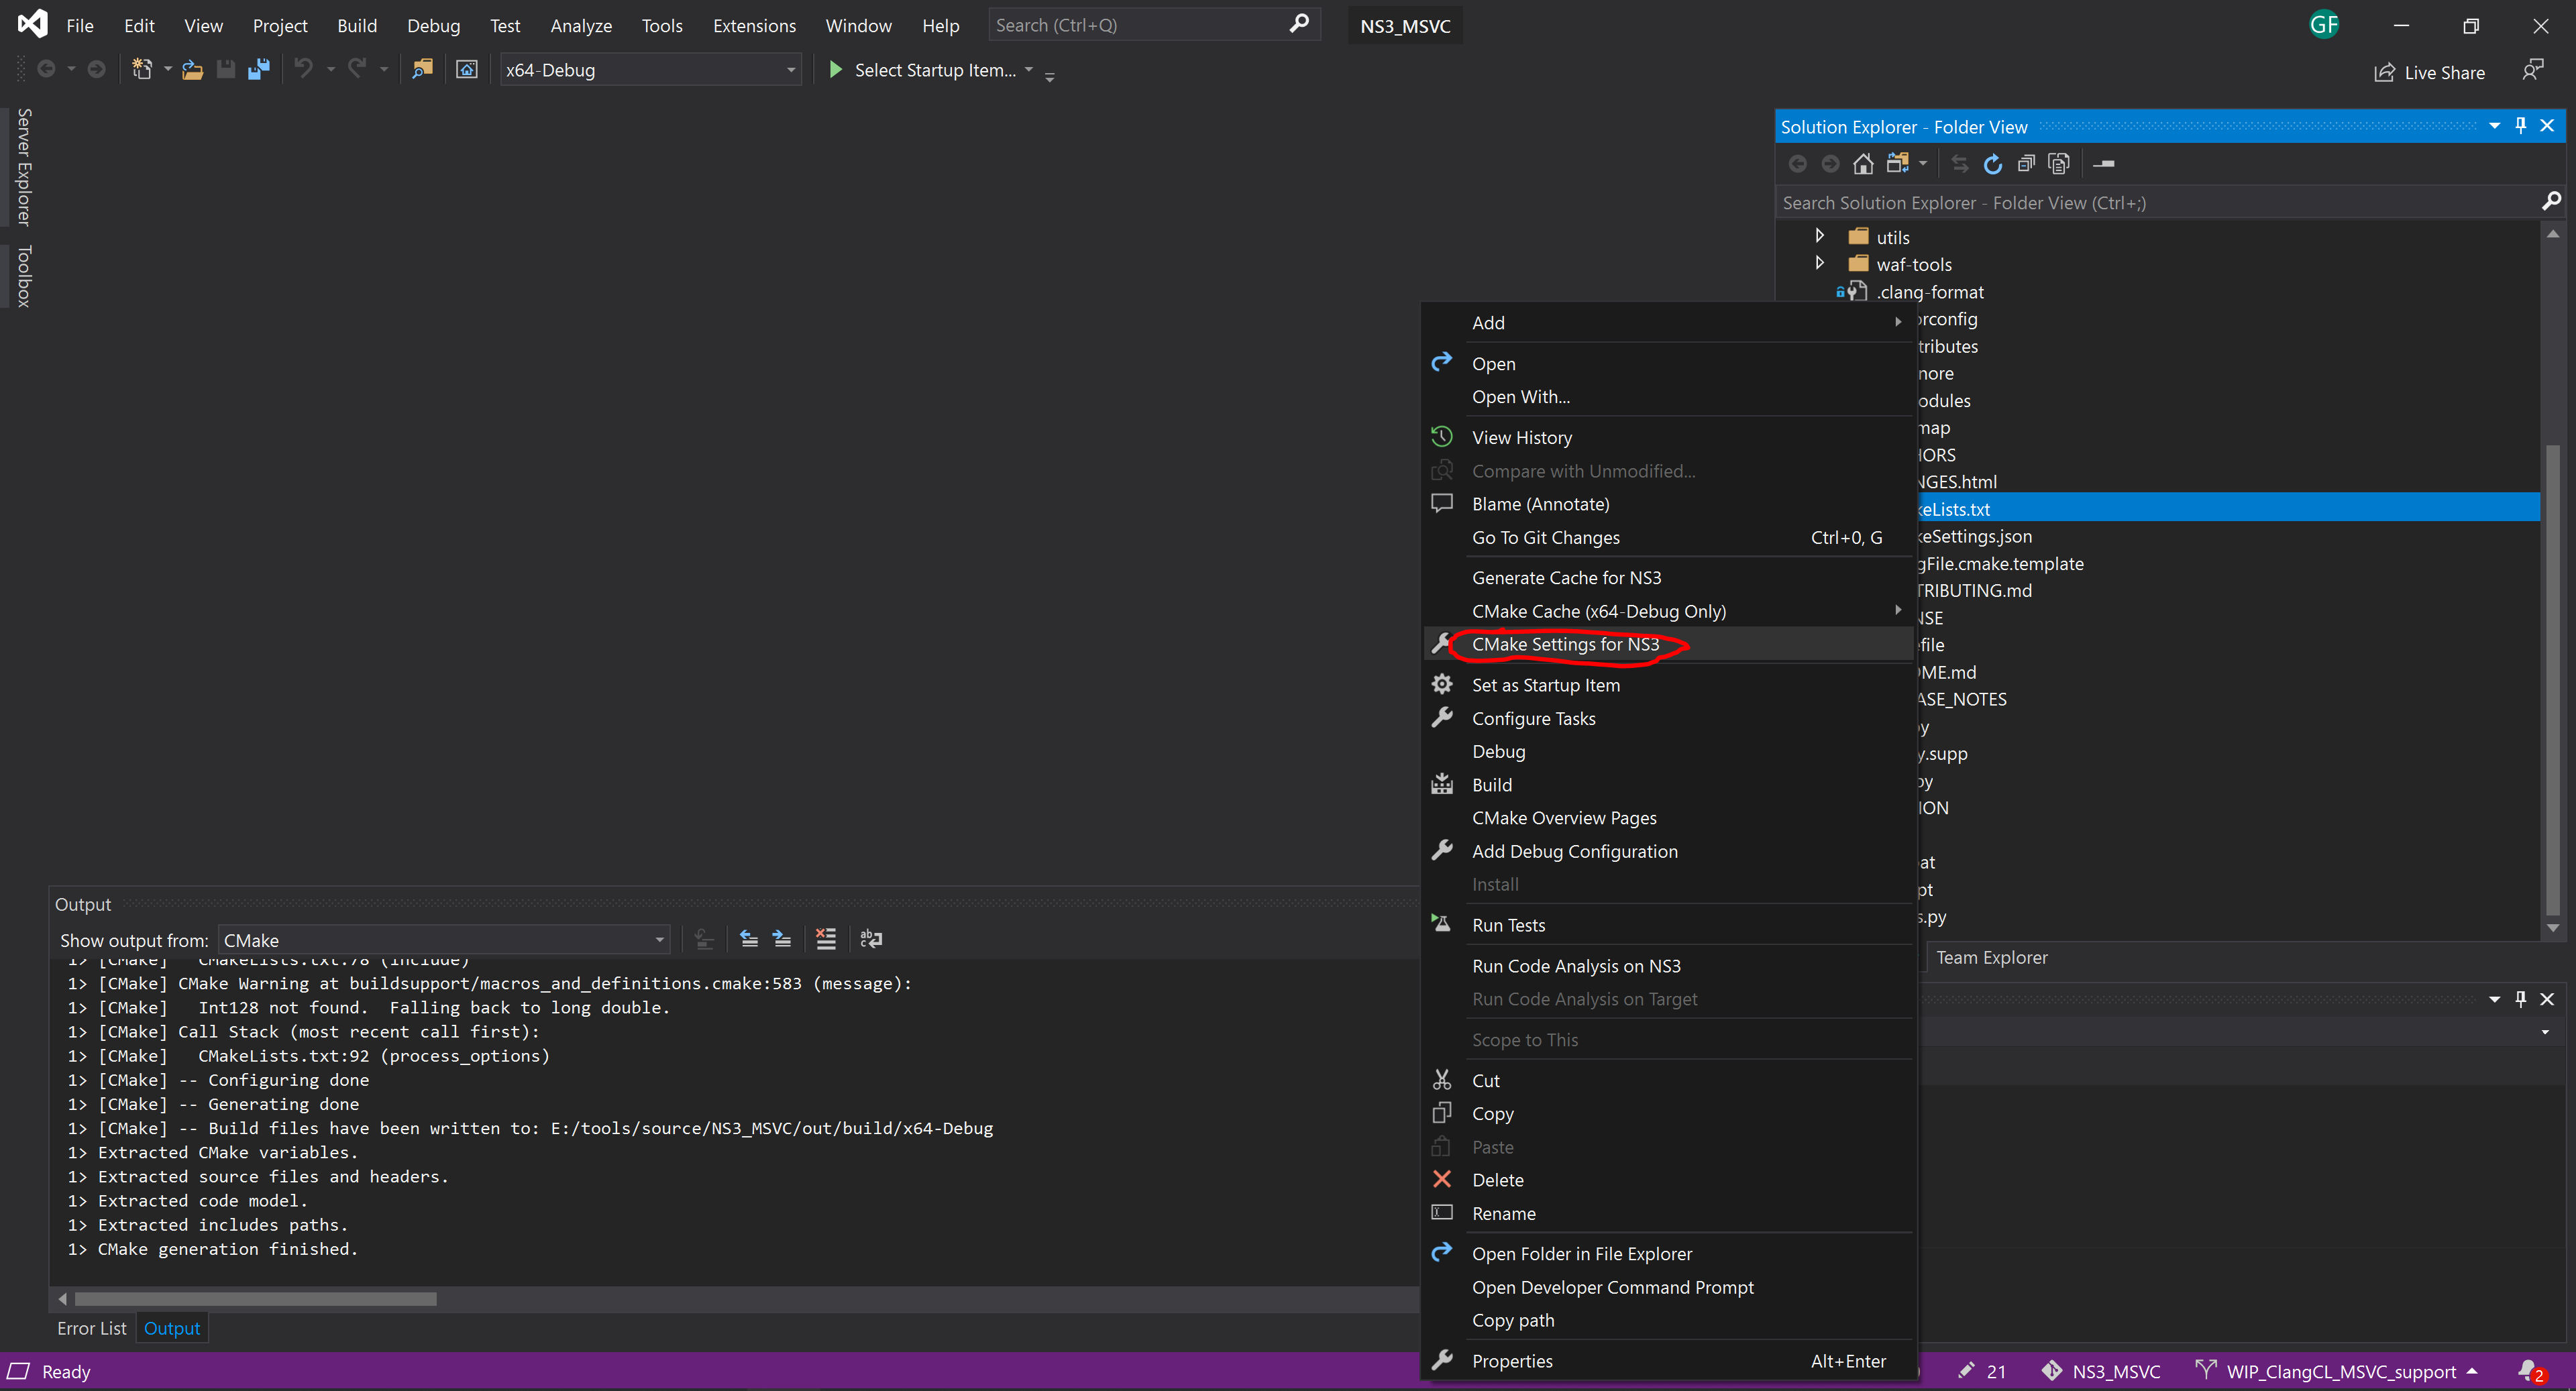
Then right-click the CMakeLists.txt file and click to generate the cmake cache.
REMINDER: Only ClangCl is supported. You must open the cmake configuration panel that Visual Studio provides,
look for advanced settings and select the appropriate clangcl toolchain. It won’t build with the MSVC (cl.exe) compiler.
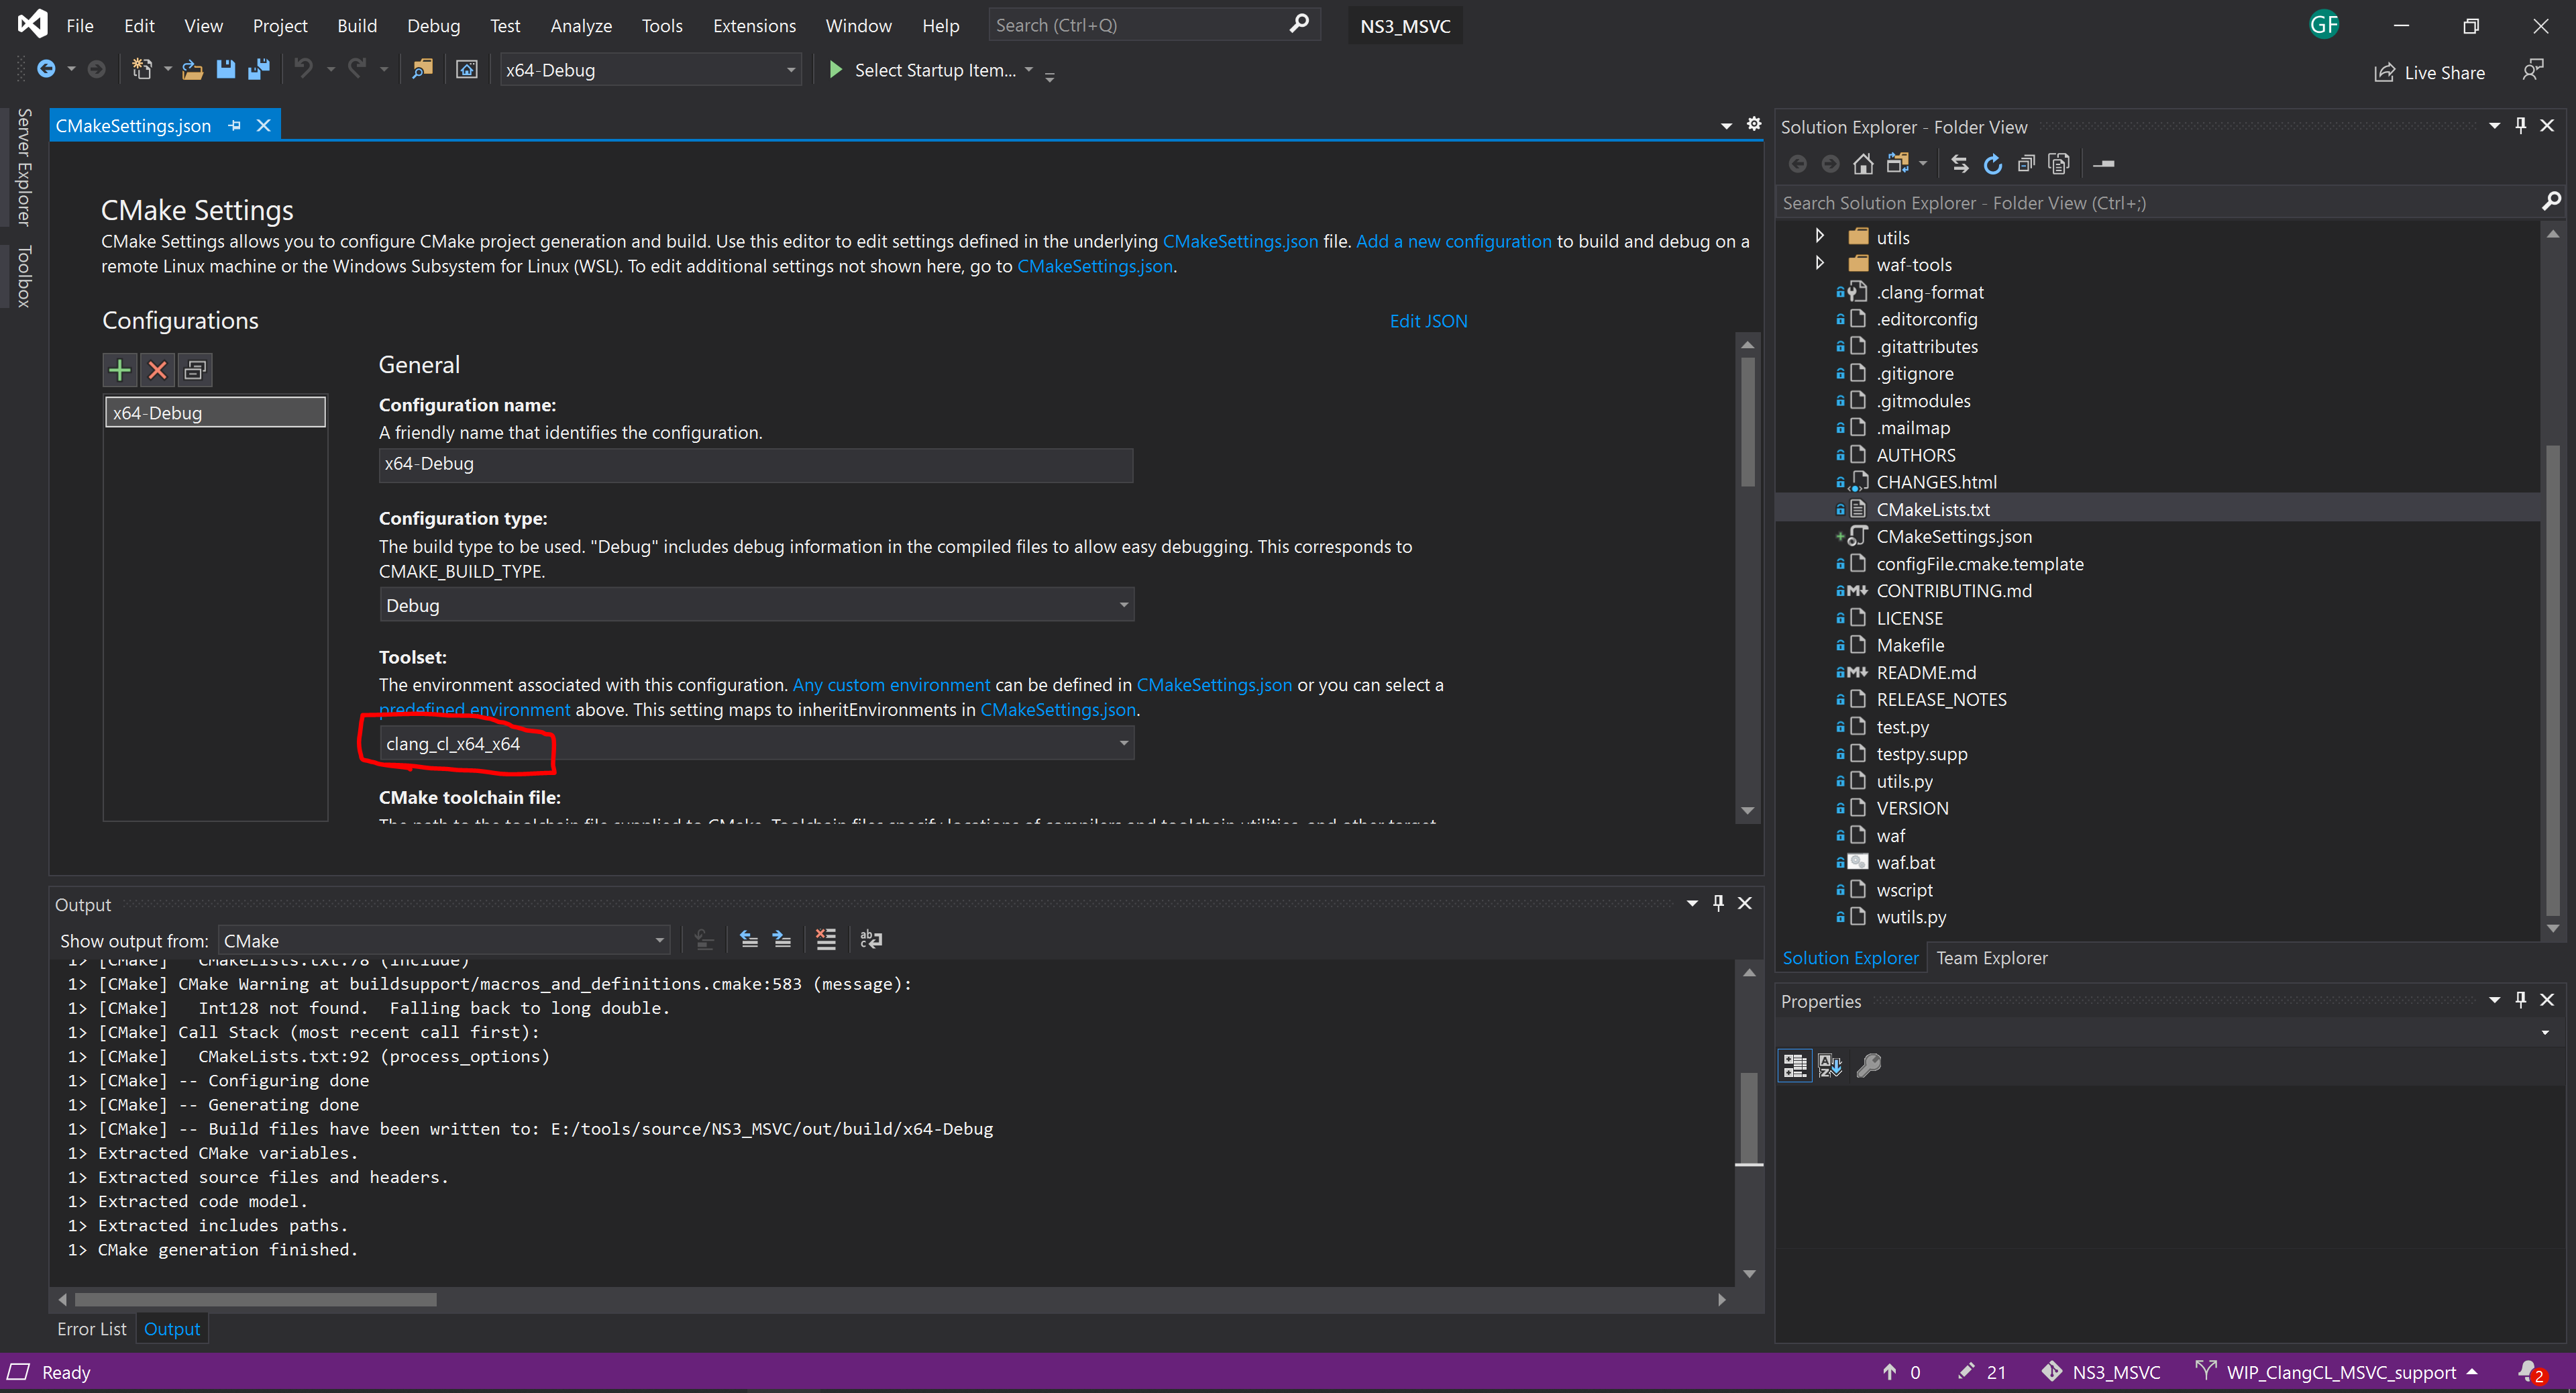
Visual Studio should regenerate the caches after that.
3.1.2 Linux Development (WSL)
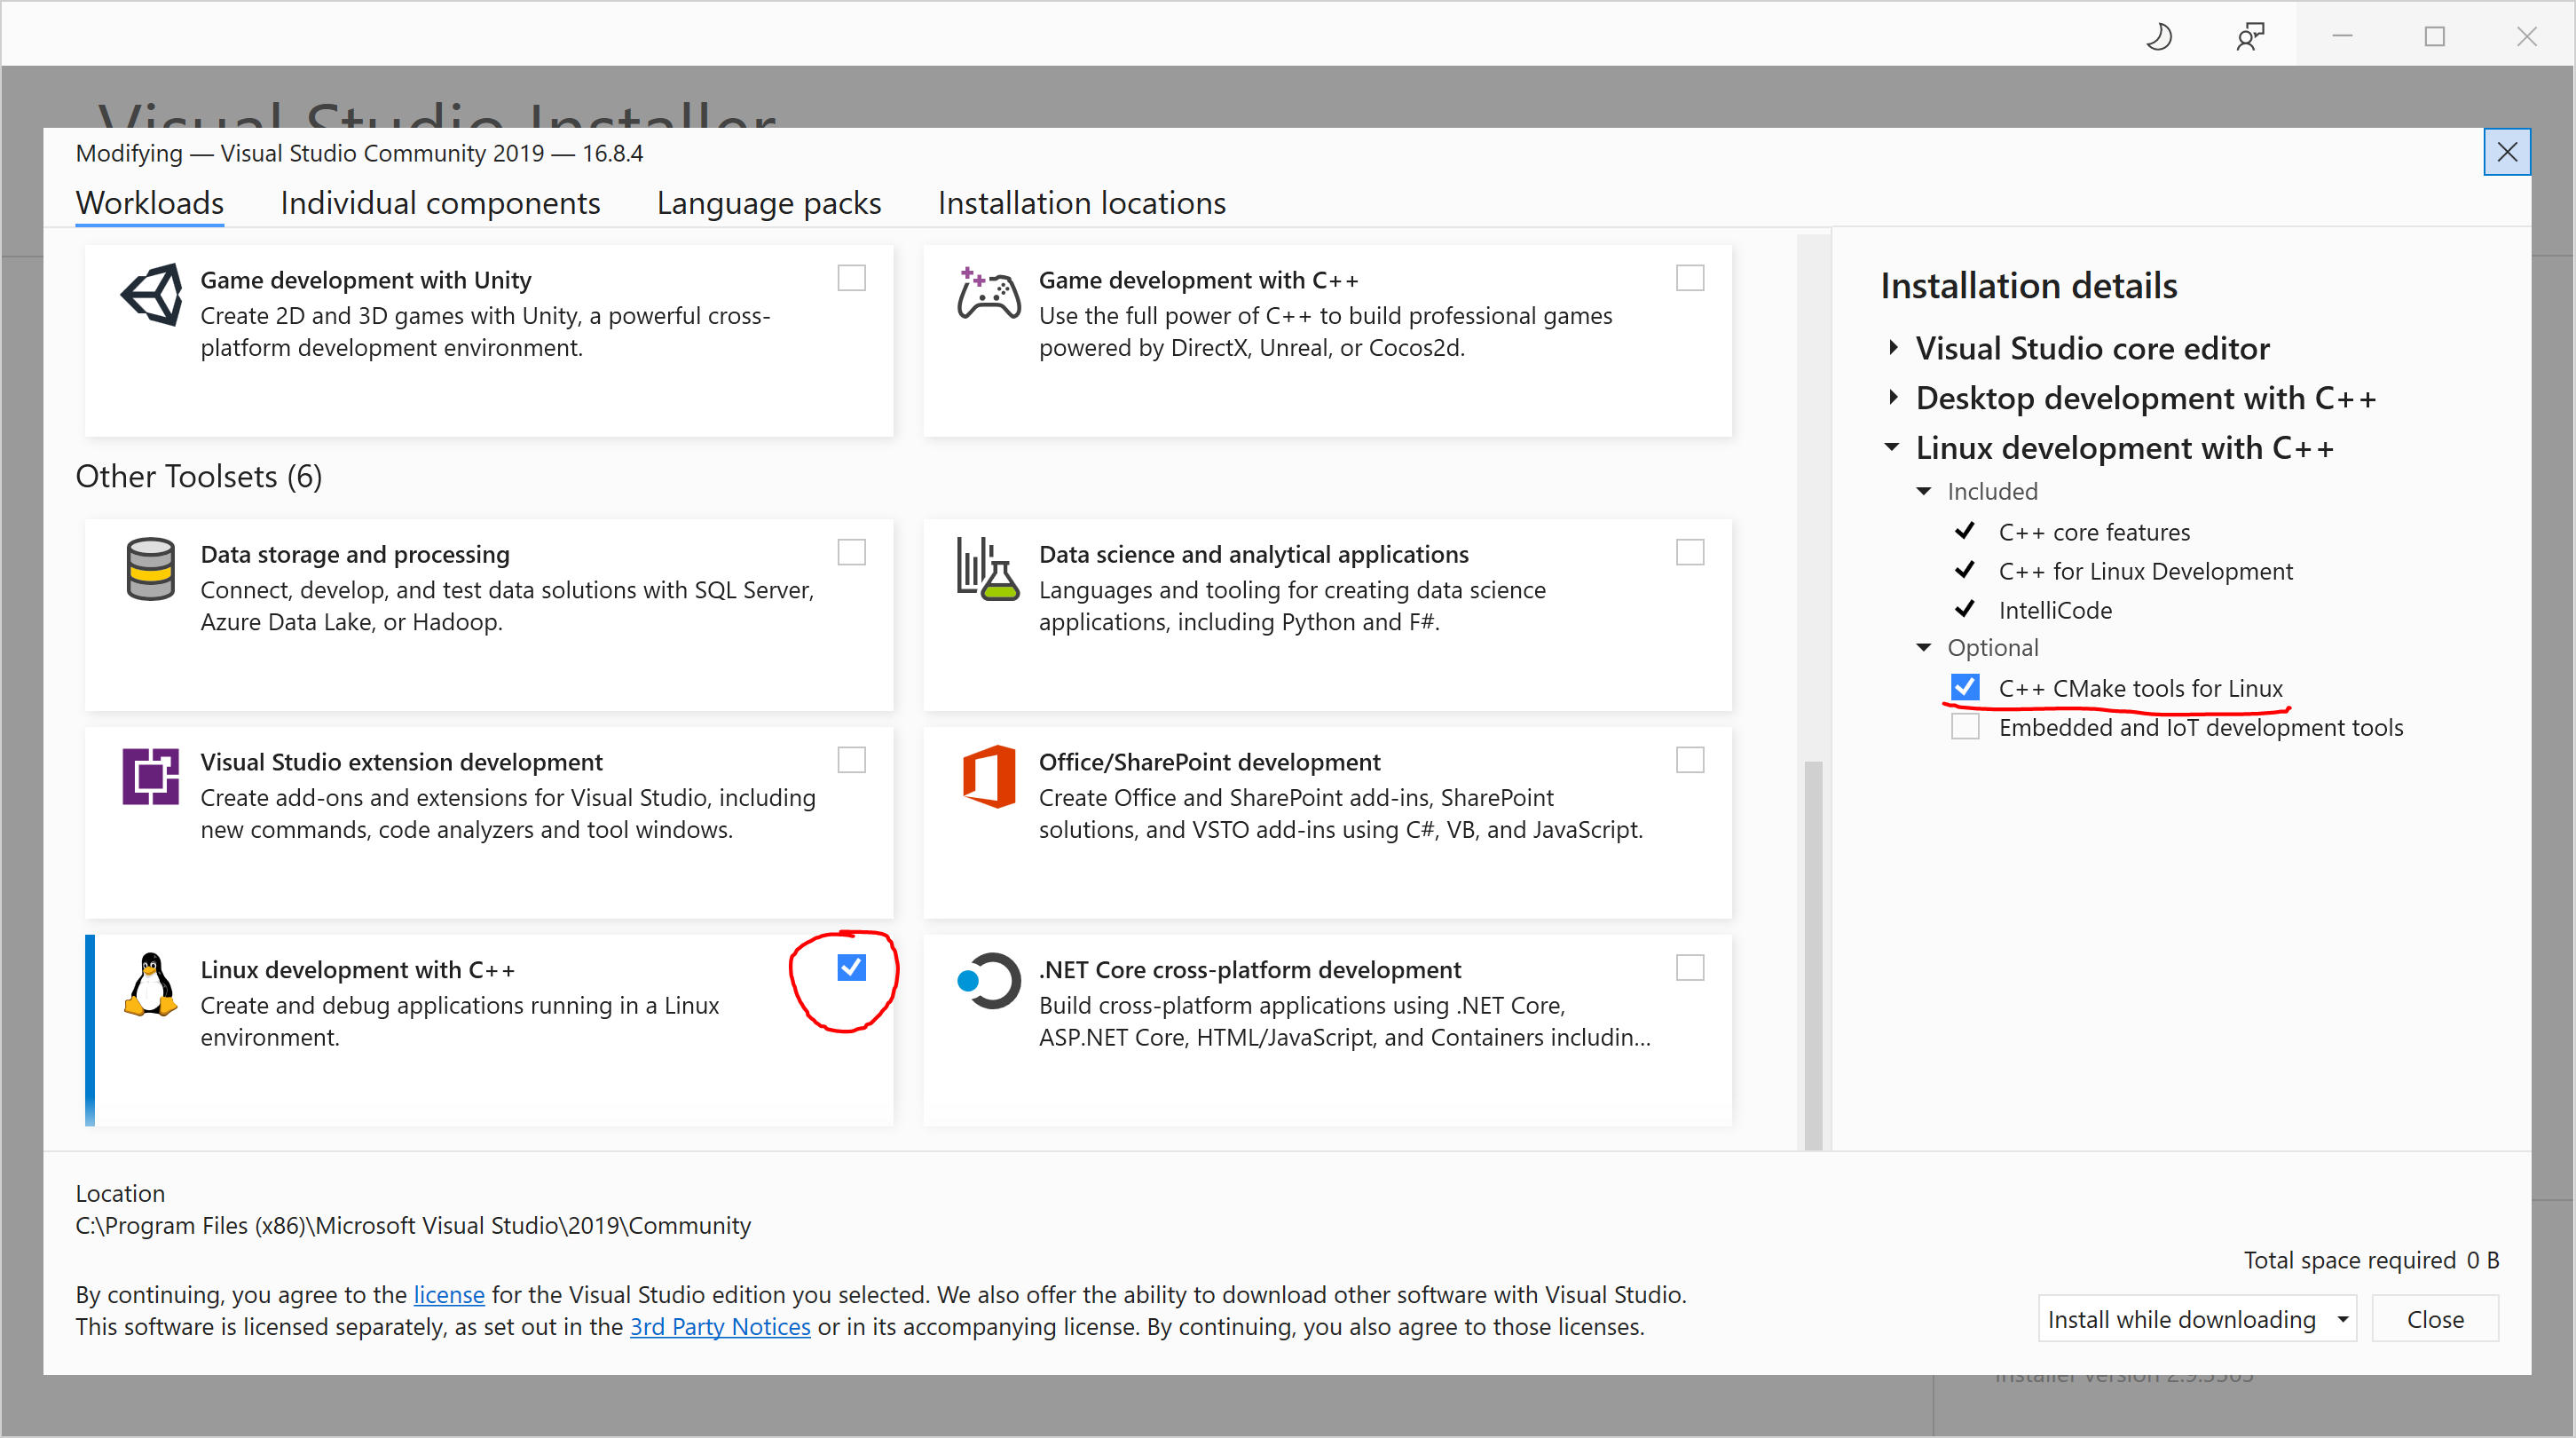
If you want to use this feature, make sure to enable the Linux development feature during Visual Studio installation.
After that open the folder containing the CMake project.
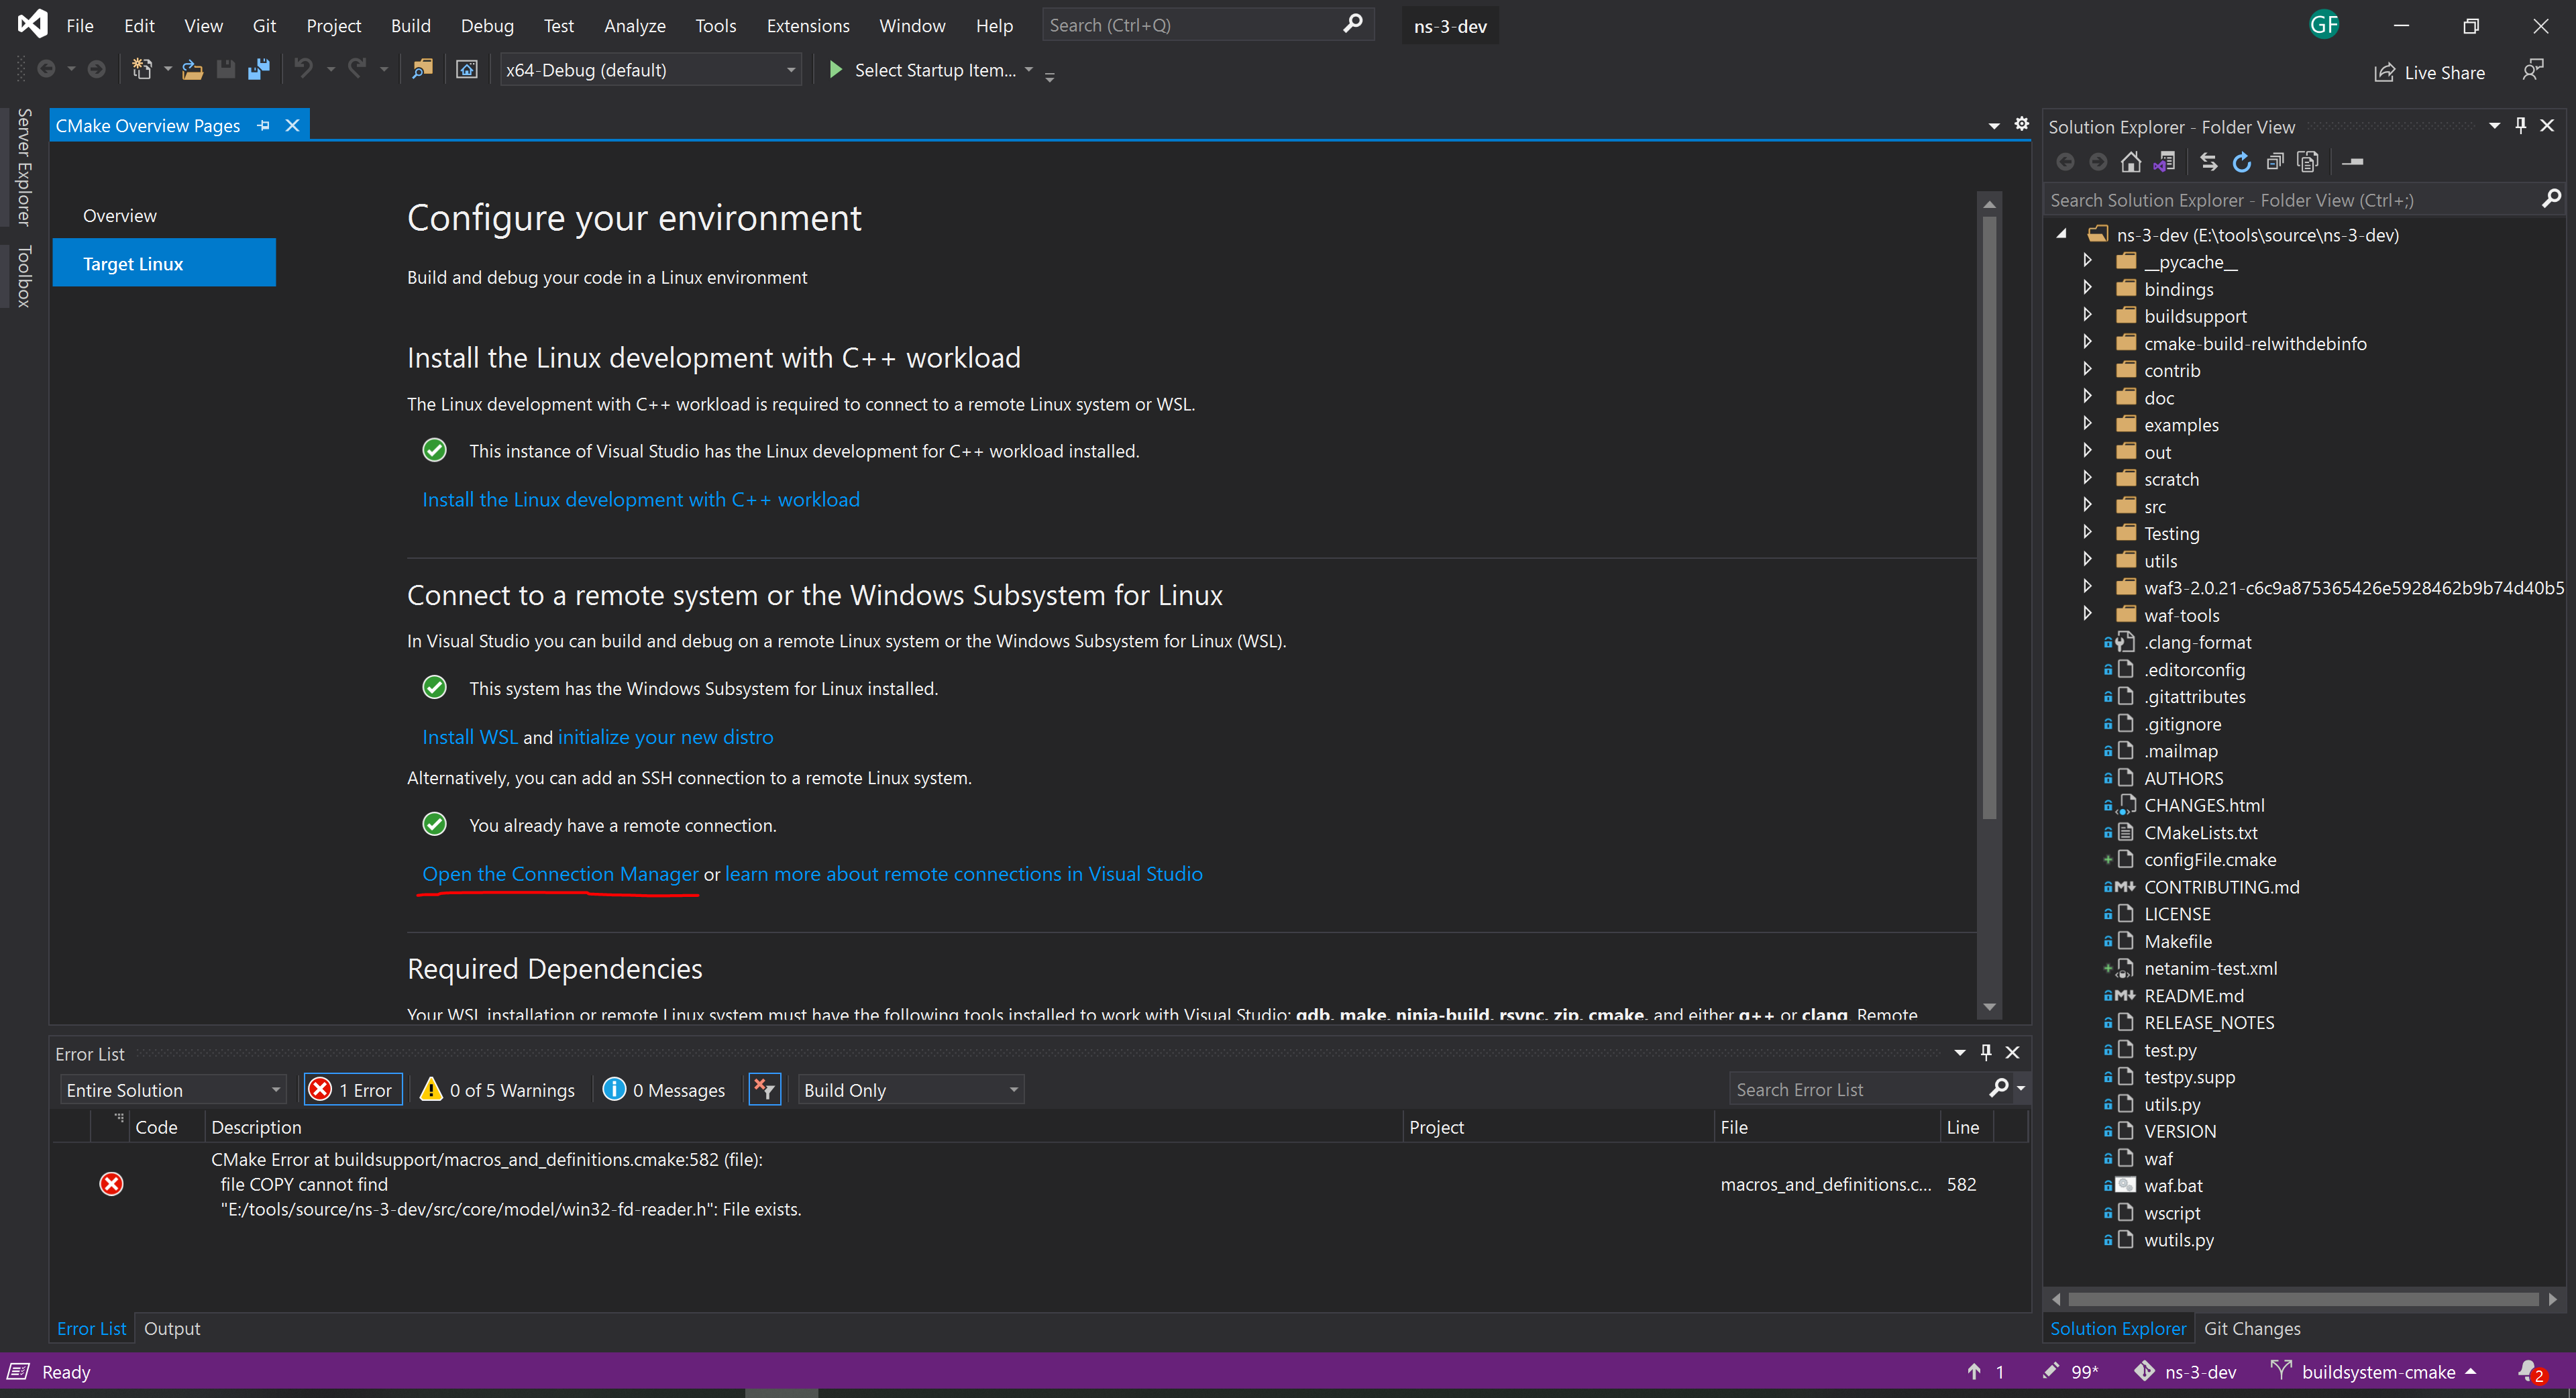
It will show a list of stuff to do (install the Visual Studio package I’ve mentioned, along with WSL). After that you will need to setup a SSH connection (I recommend to follow the Jetbrains instructions mentioned in the WSL section).
When you click to open the Connection Manager, a window will open. Then you need to add a new entry with your WSL credentials.
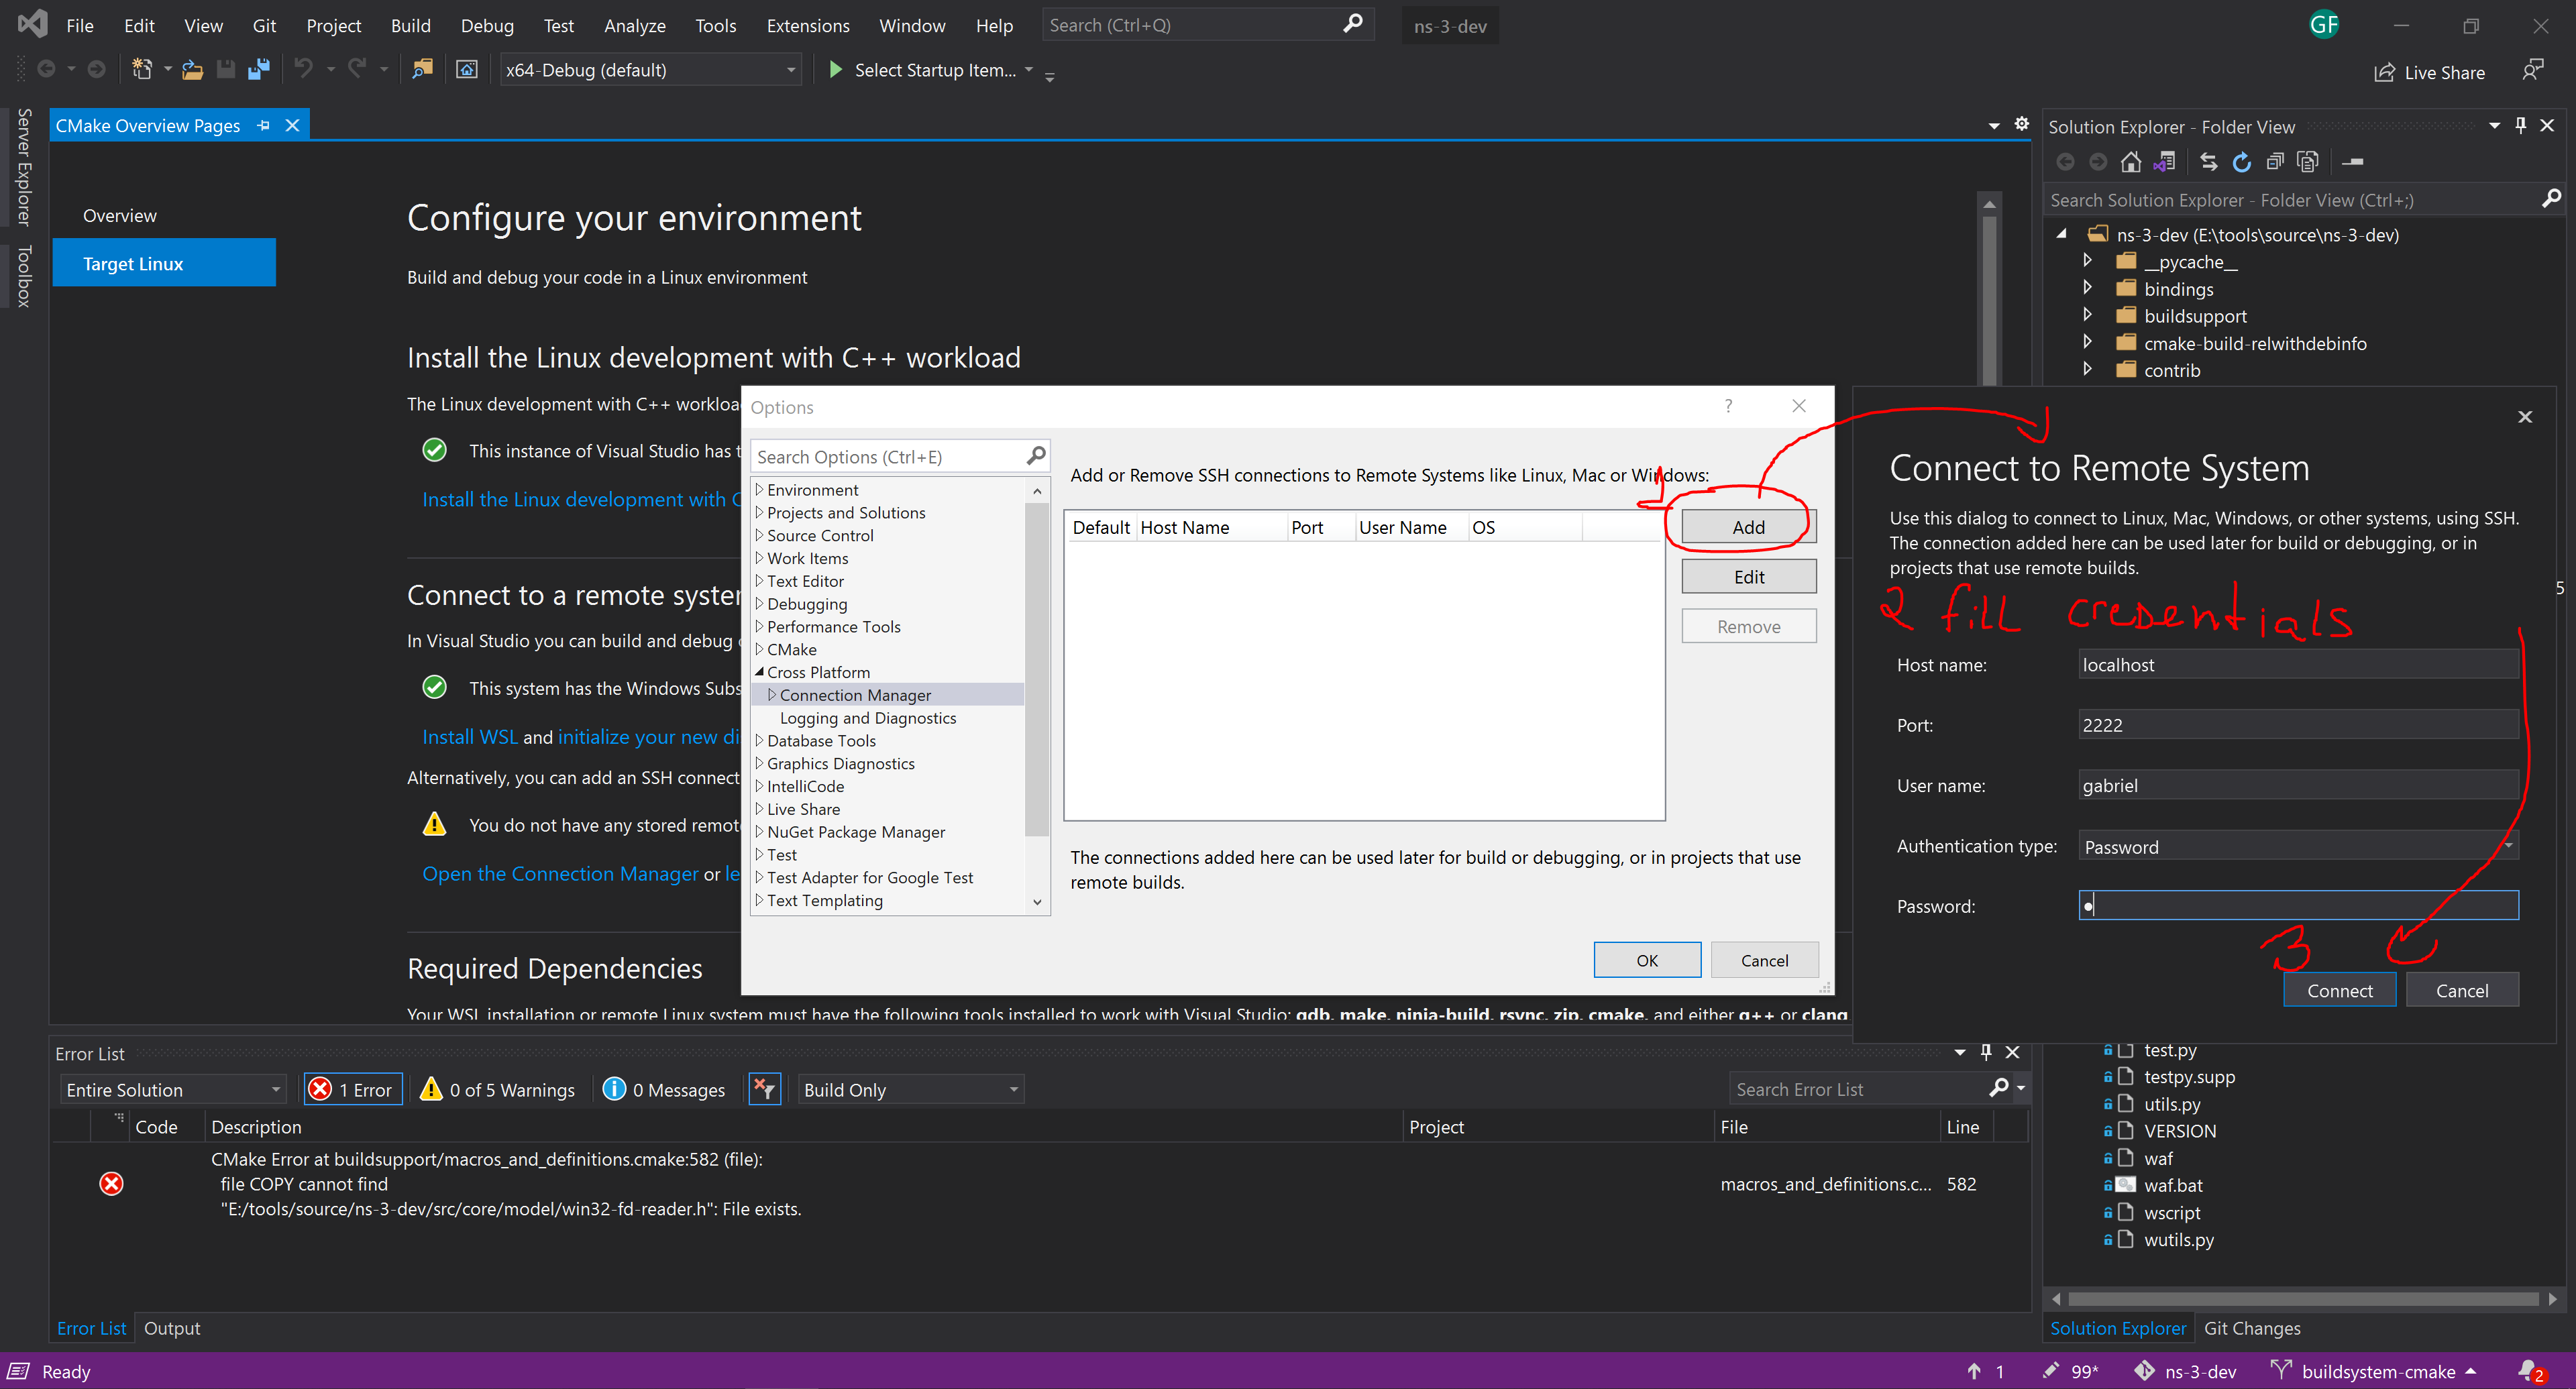
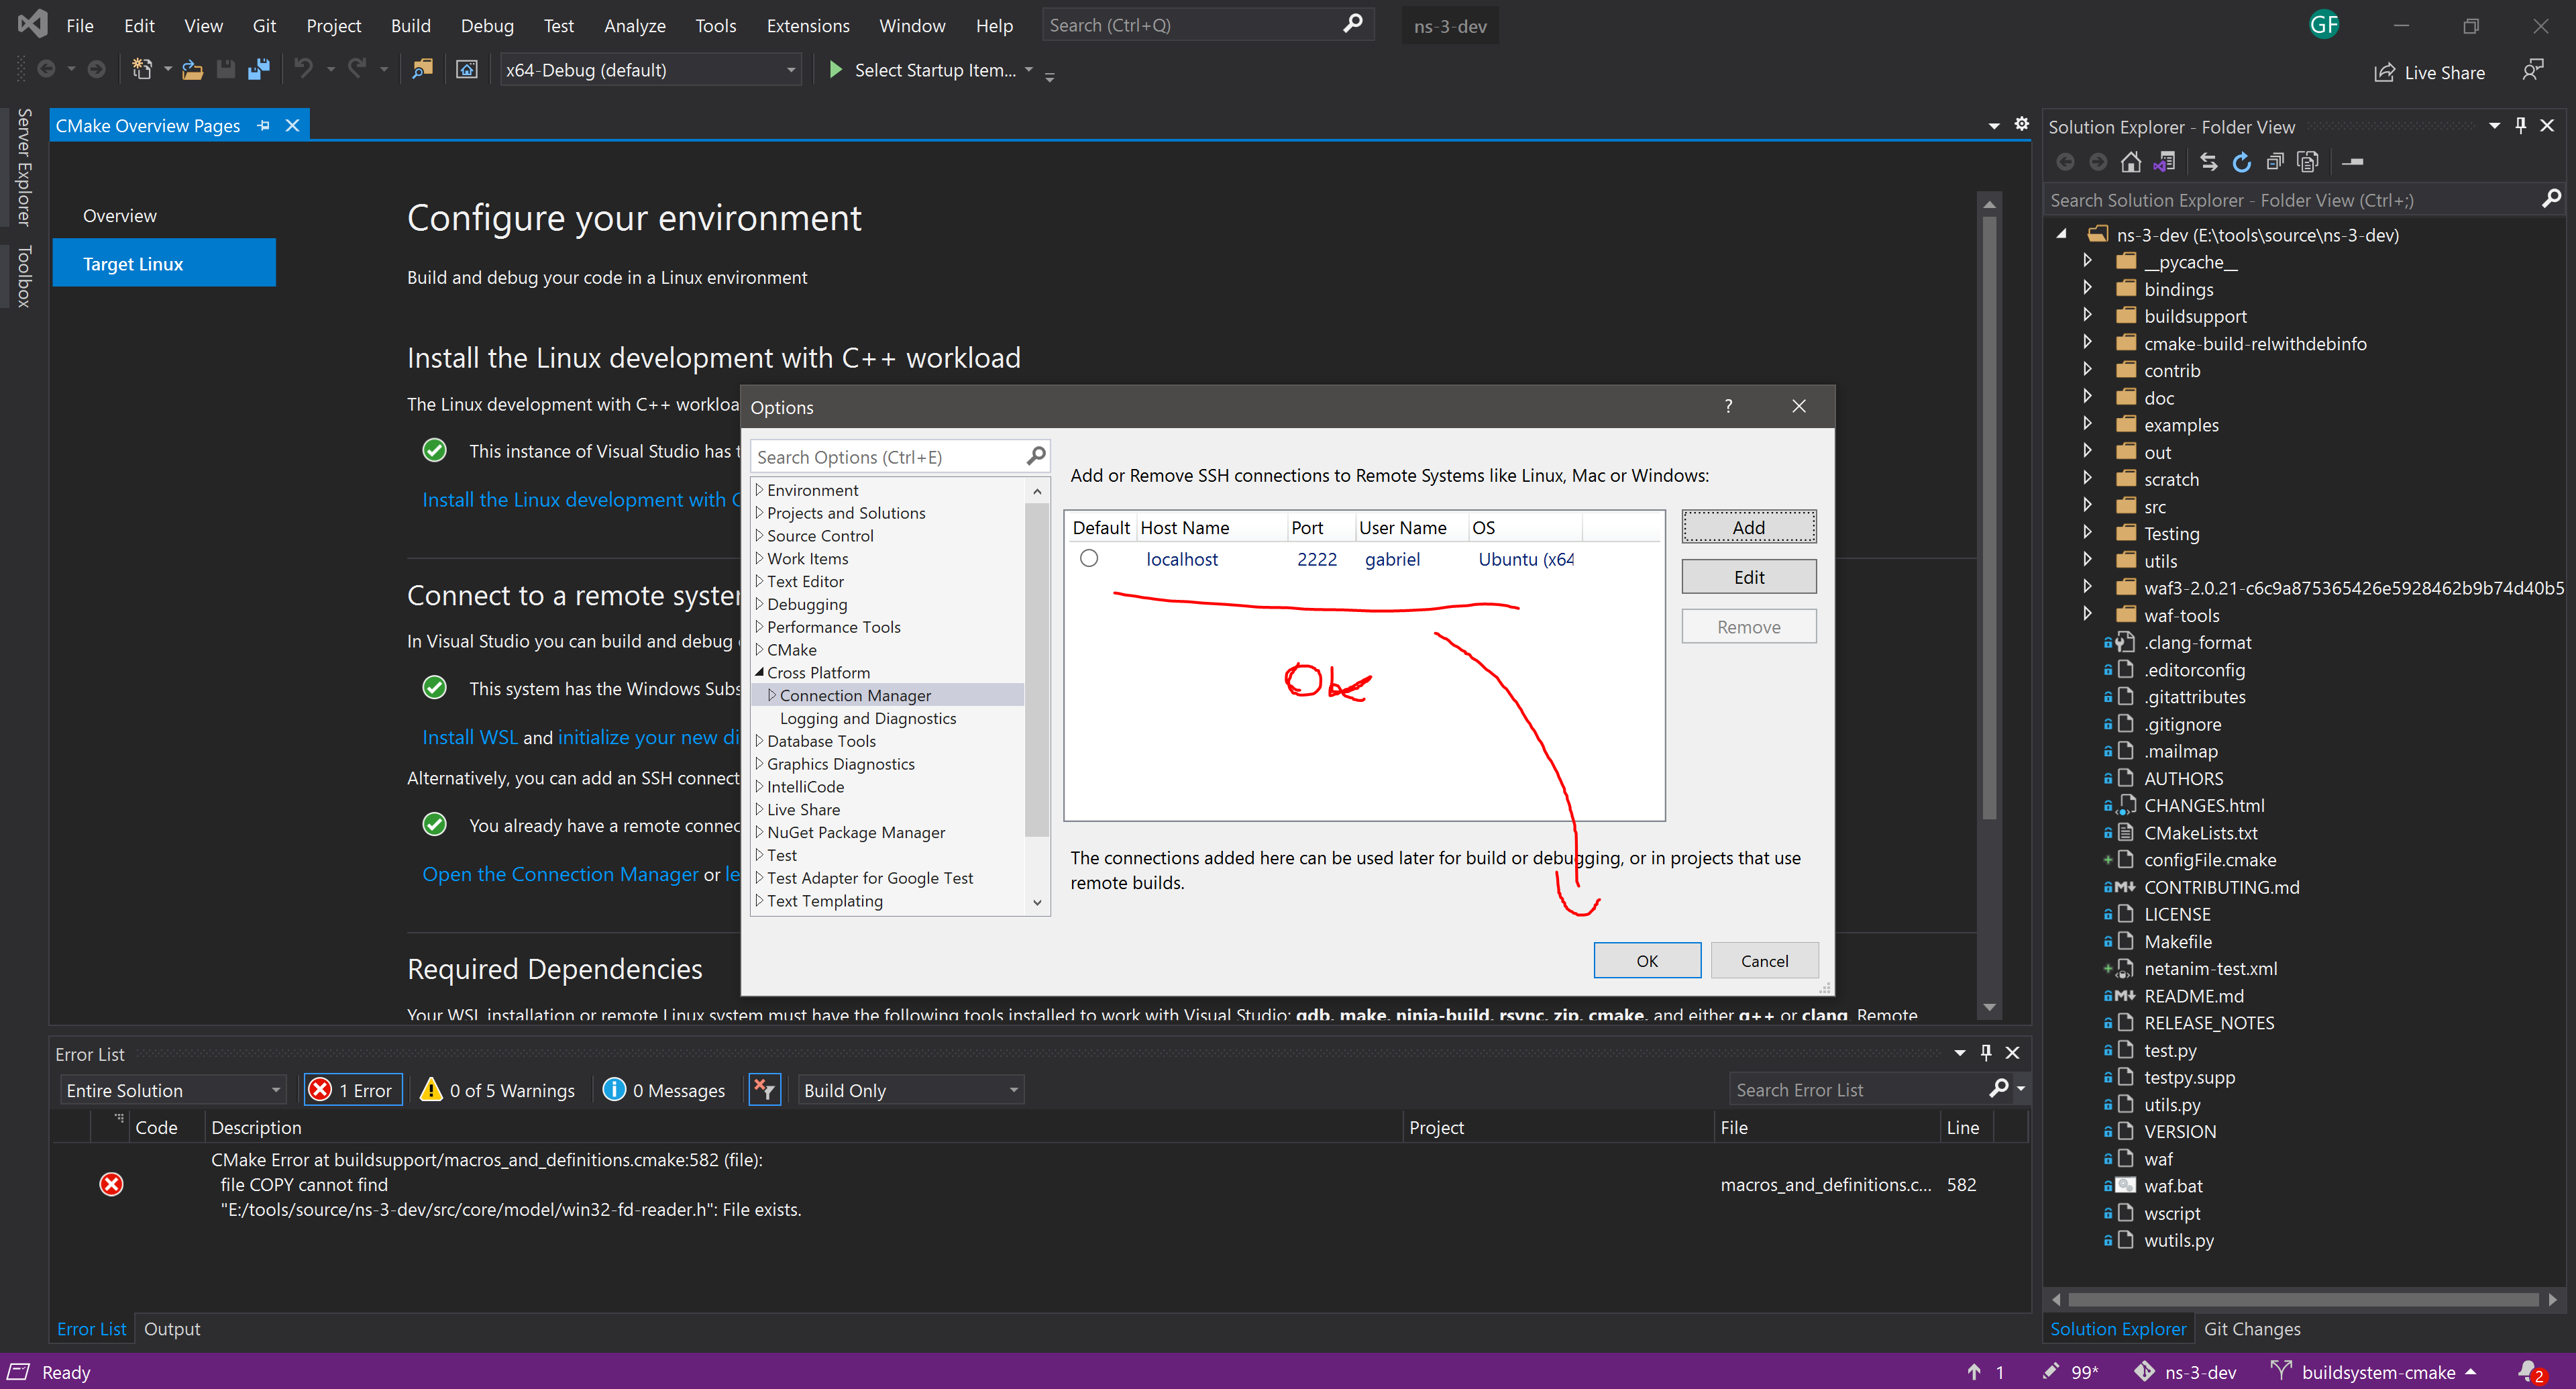
When you’re done and close the credentials window, the connection will be listed.
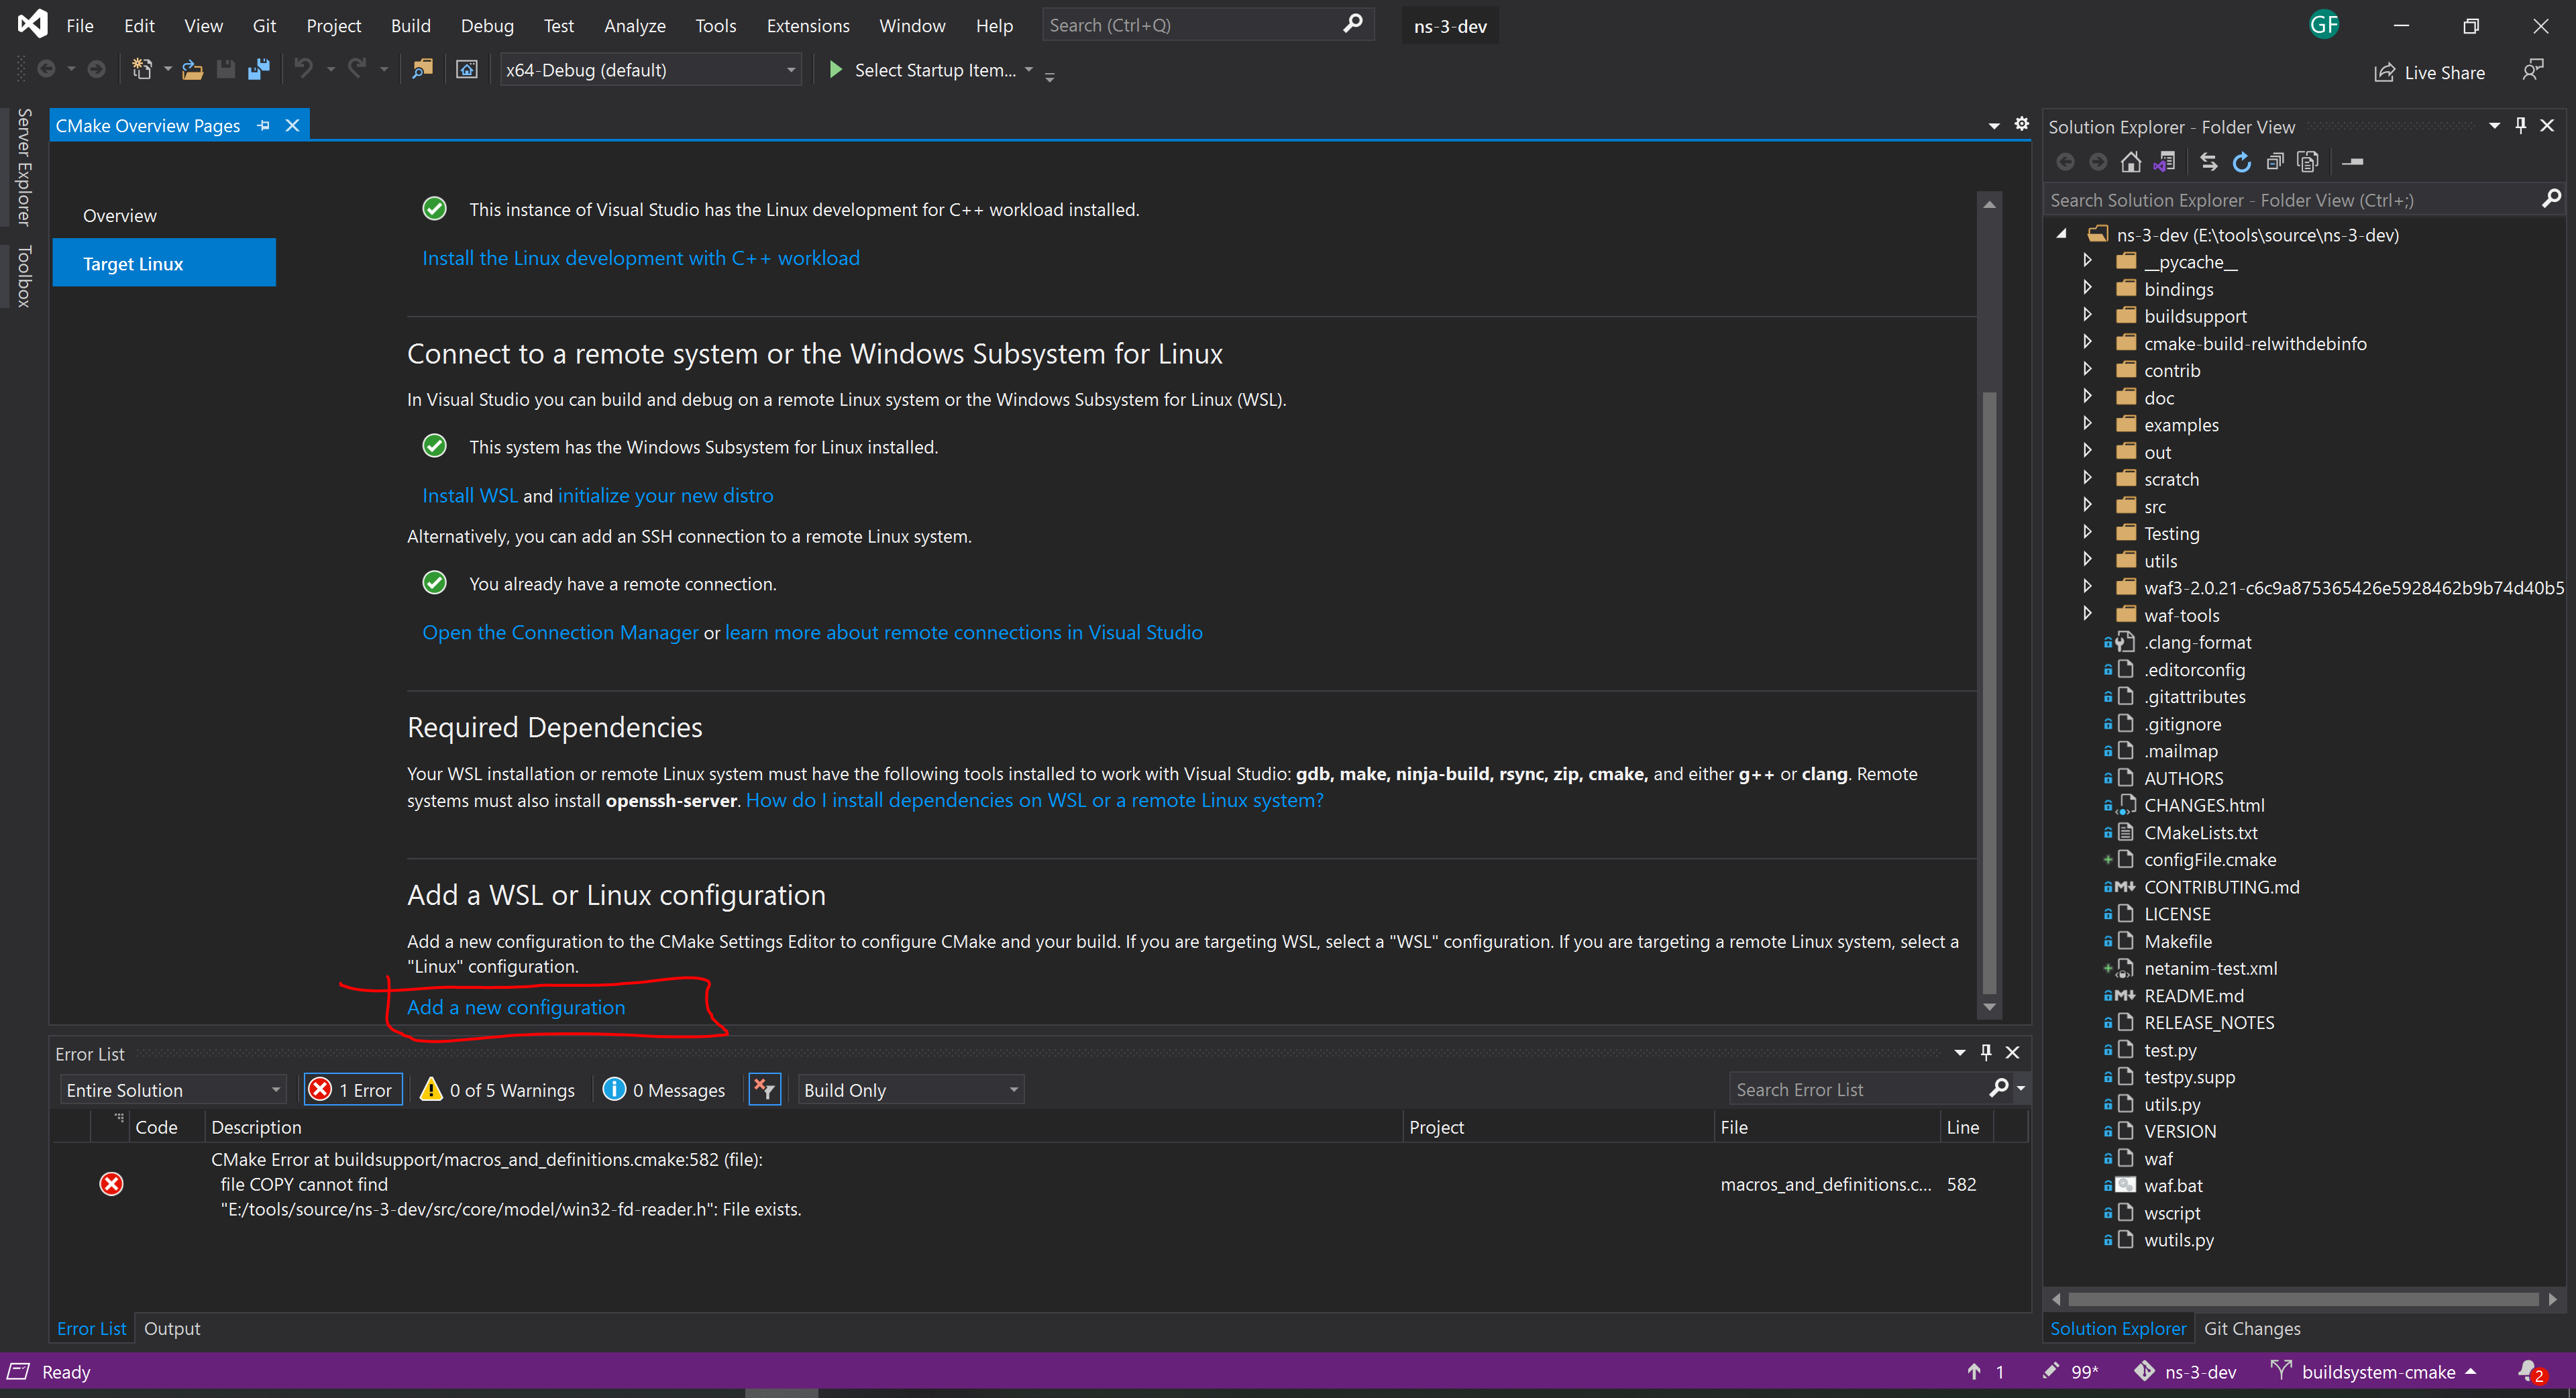
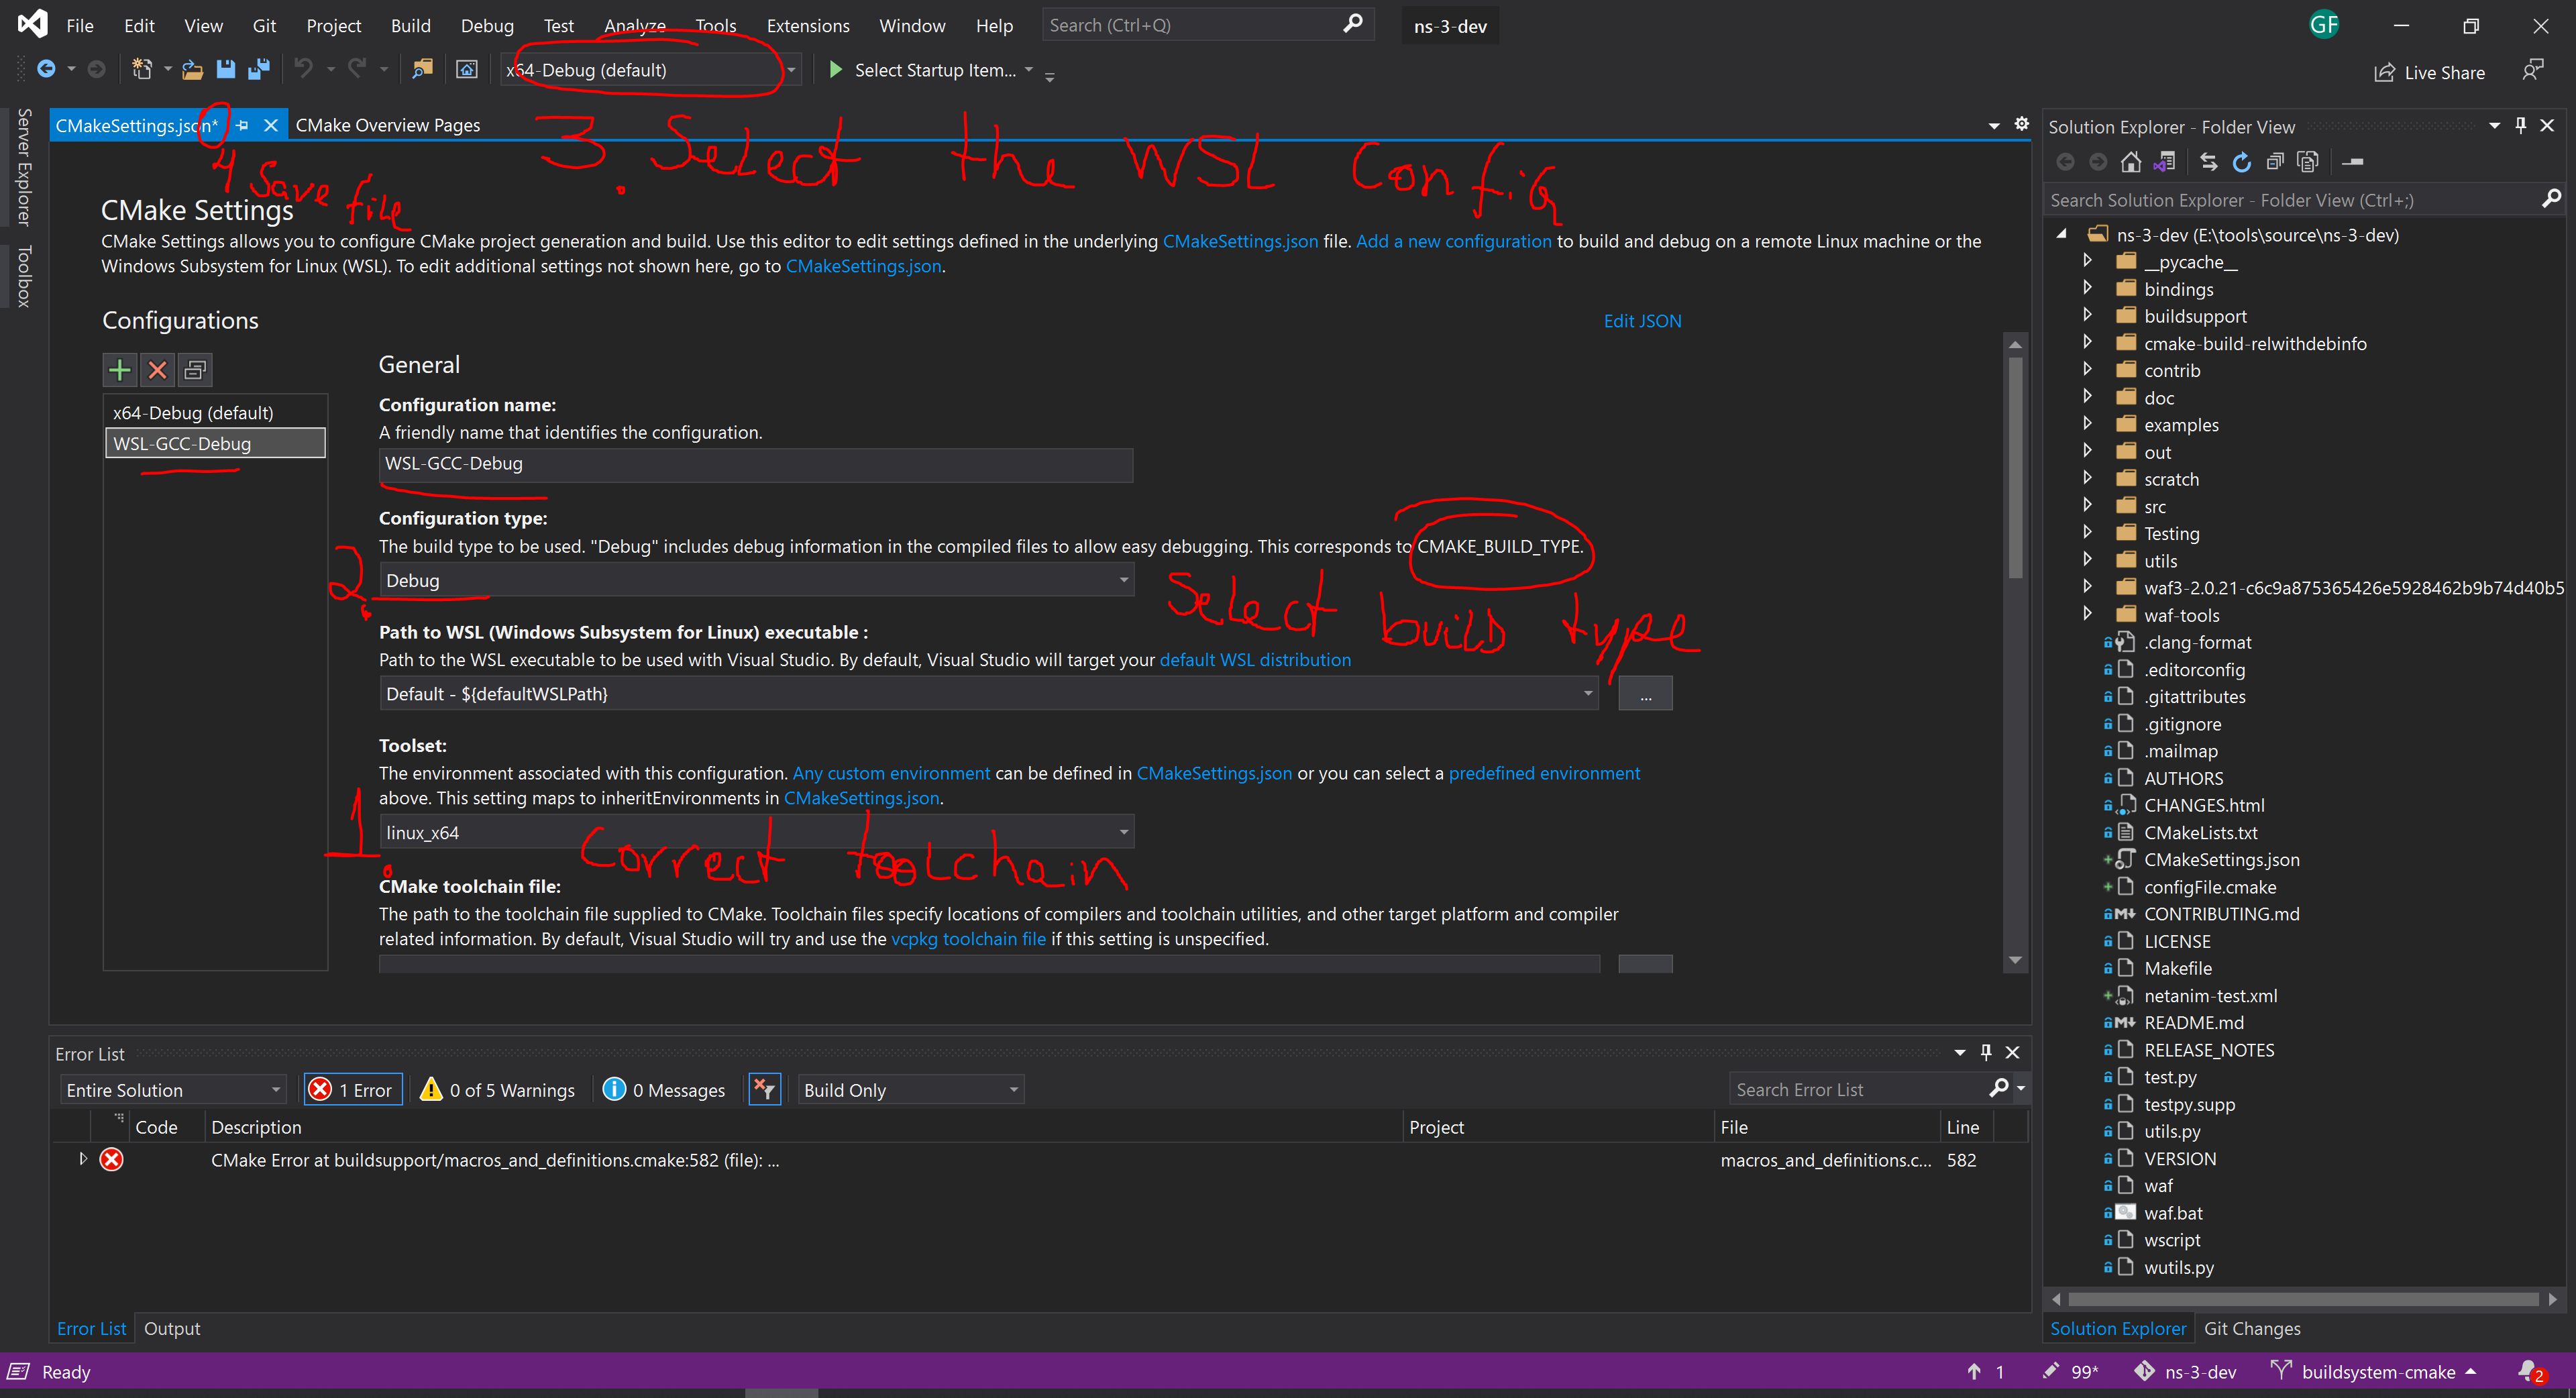
After that, click the add a new configuration button, to add the WSL as a Visual Studio target.
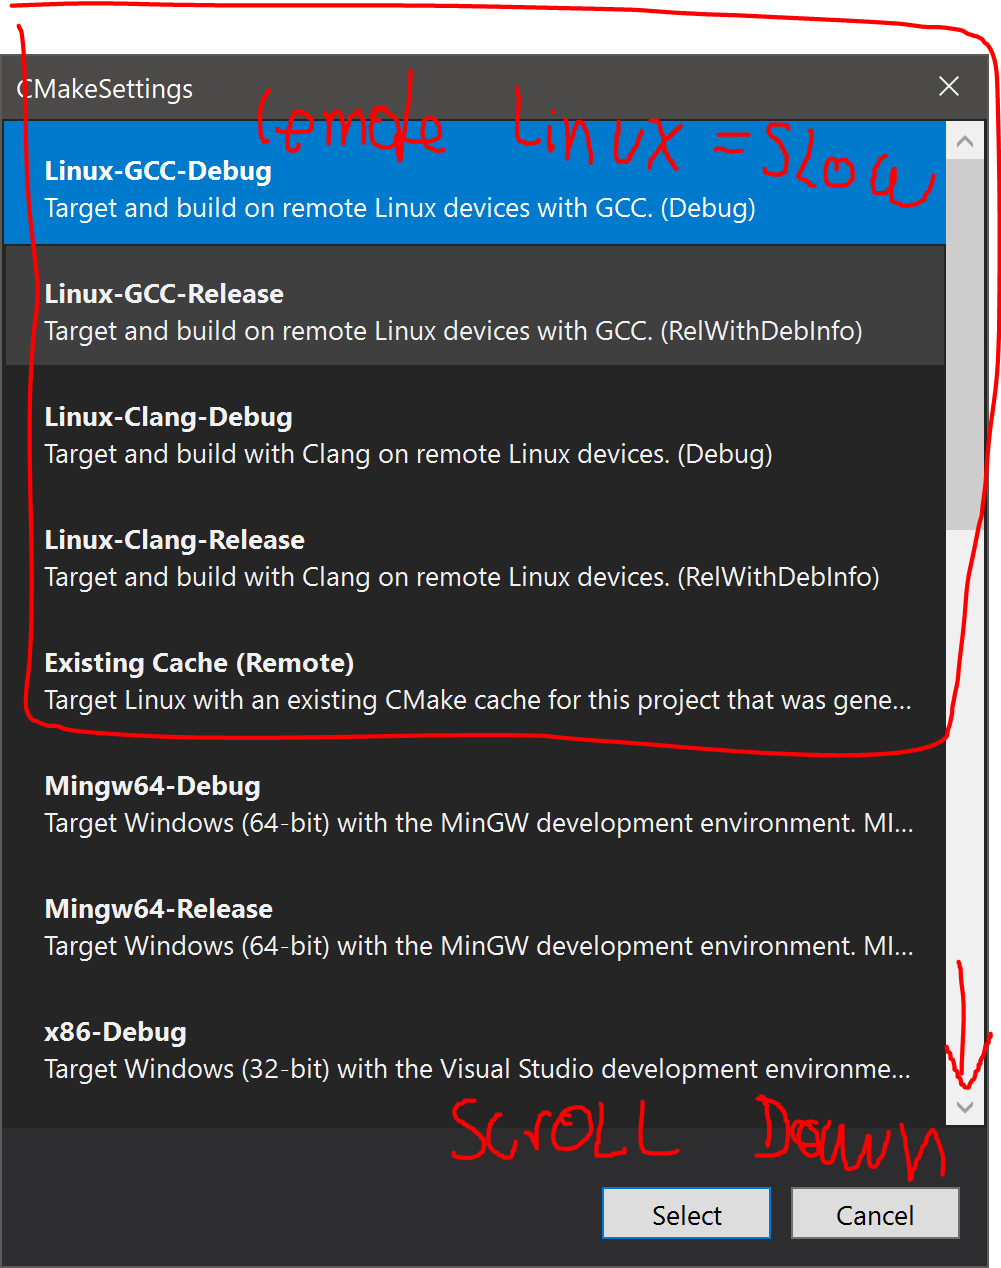
3.1.2.1 Remote Linux mode
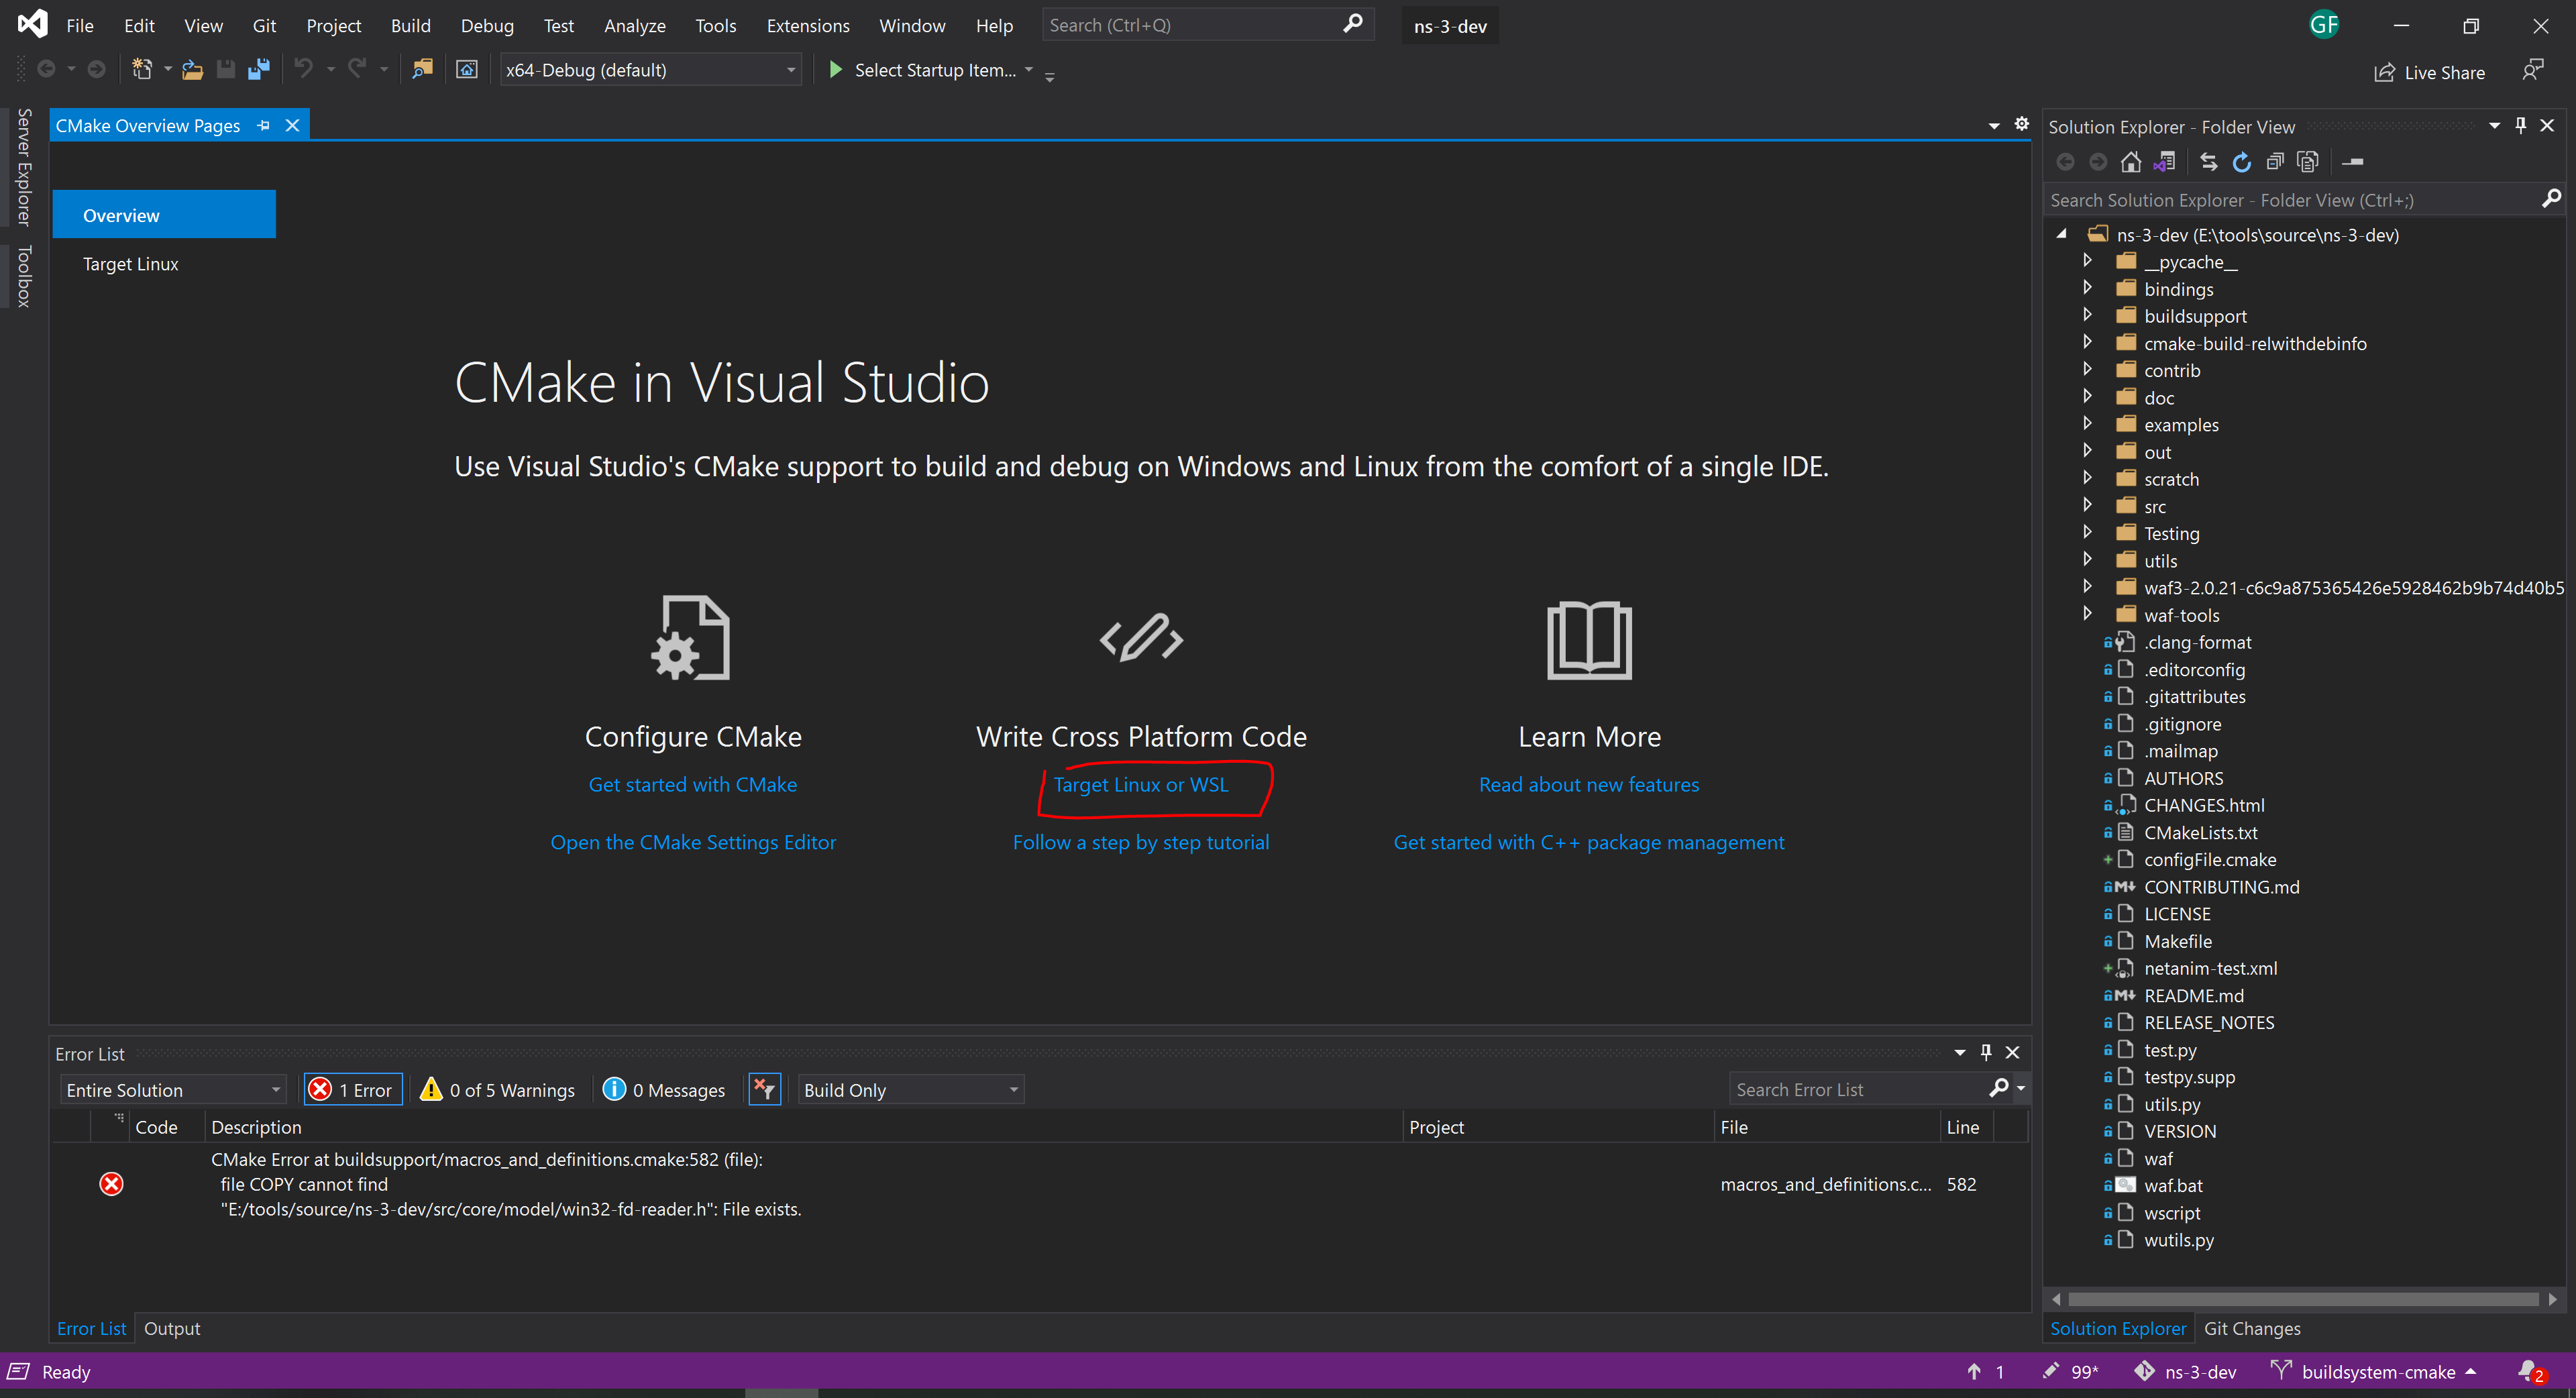
If you choose remote linux for development, you can use either the GCC or Clang compilers. The default options offer debug and release with debug info configurations, or just use the pre-existing cache (e.g. configured with the command line/prompt). The remote linux option is quite slow, as the local development folder is constantly synced with the remote server using rsync. I suggest to scroll down and use WSL mode (next section).
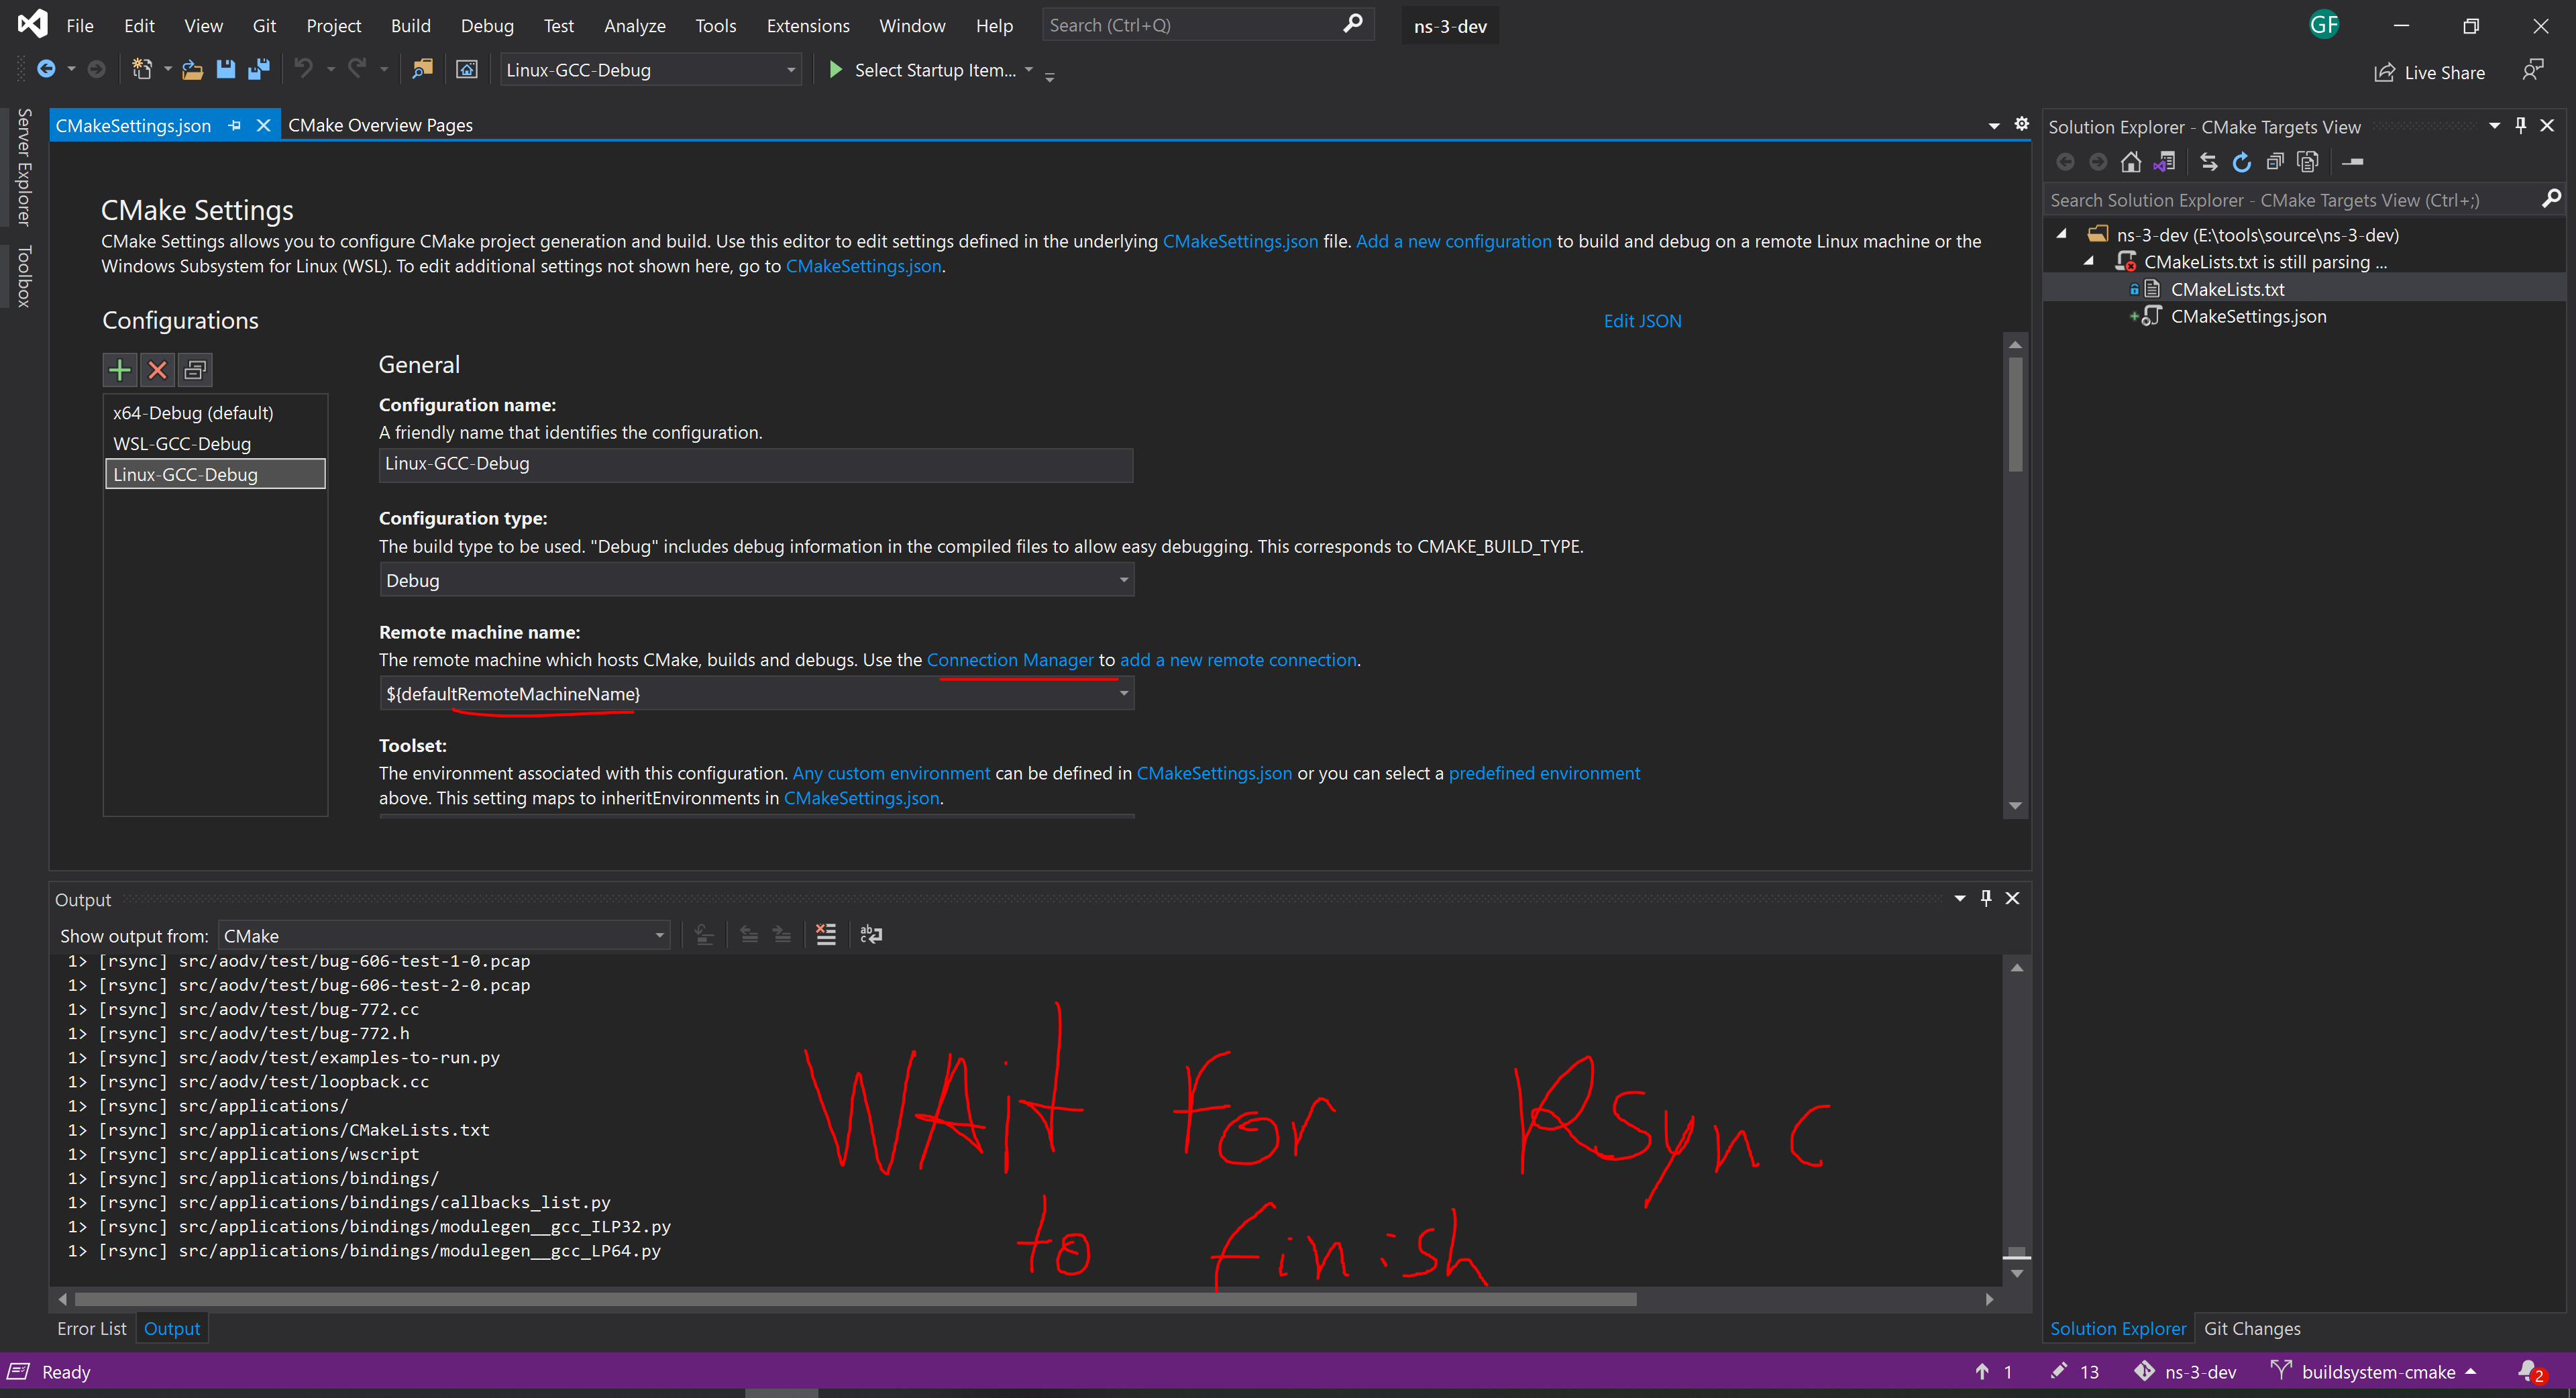
After confirming, you will be able to select your newly created configuration as a target.
Visual Studio will start syncing the local development folder with the remote server (in this case WSL). It will take a while.
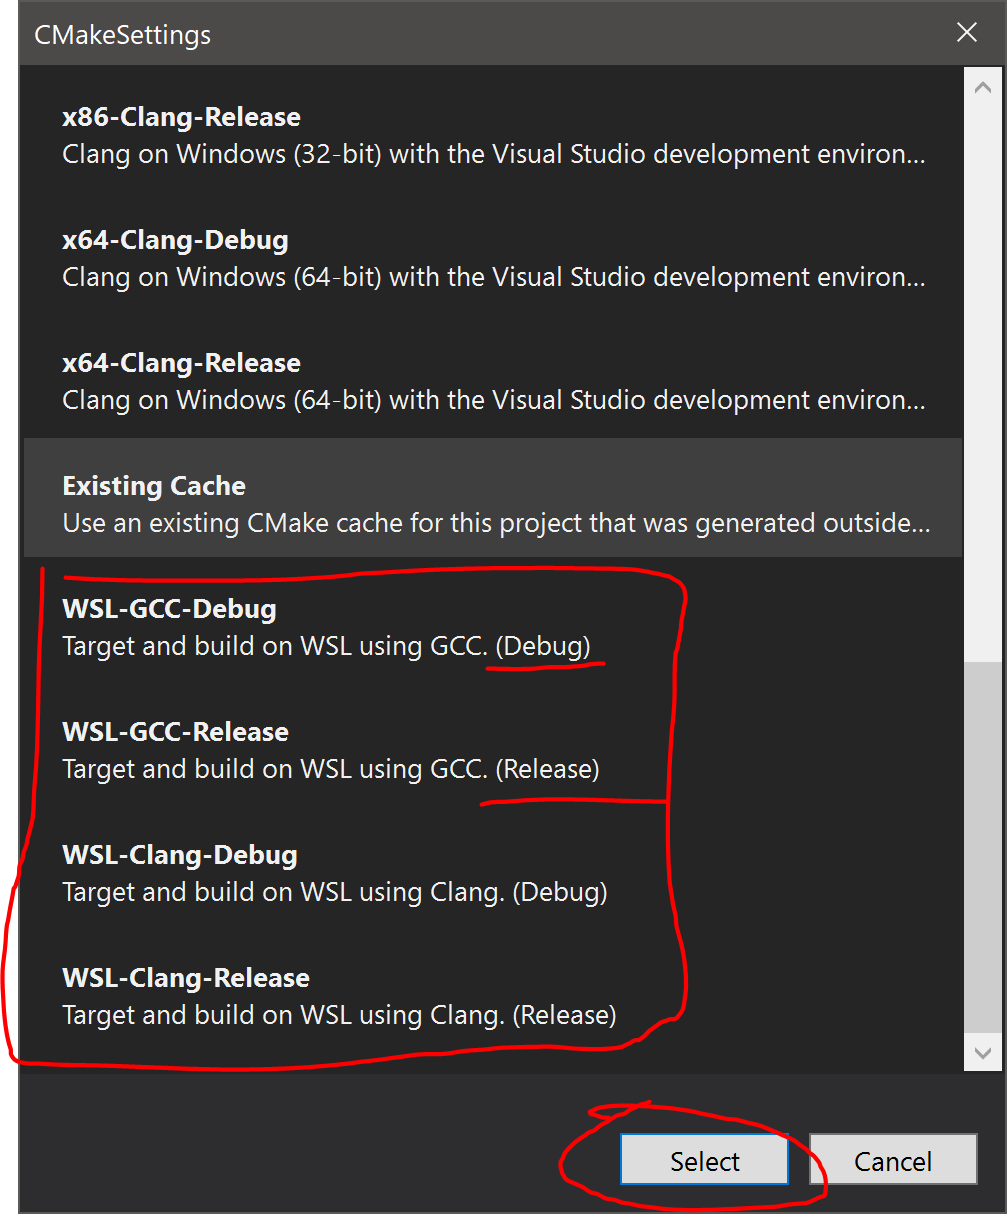
3.1.2.2 WSL mode
If you use WSL mode, you can also choose between GCC or Clang compilers. Here the default options are debug and release (without debugging info), or a pre-existing cache (e.g. configured with the command line/prompt).
After confirming, you will be able to select your newly created configuration as a target. At this point a yellow banner should pop up on the top offering to install a customized CMake that supports the WSL/Visual Studio interaction.
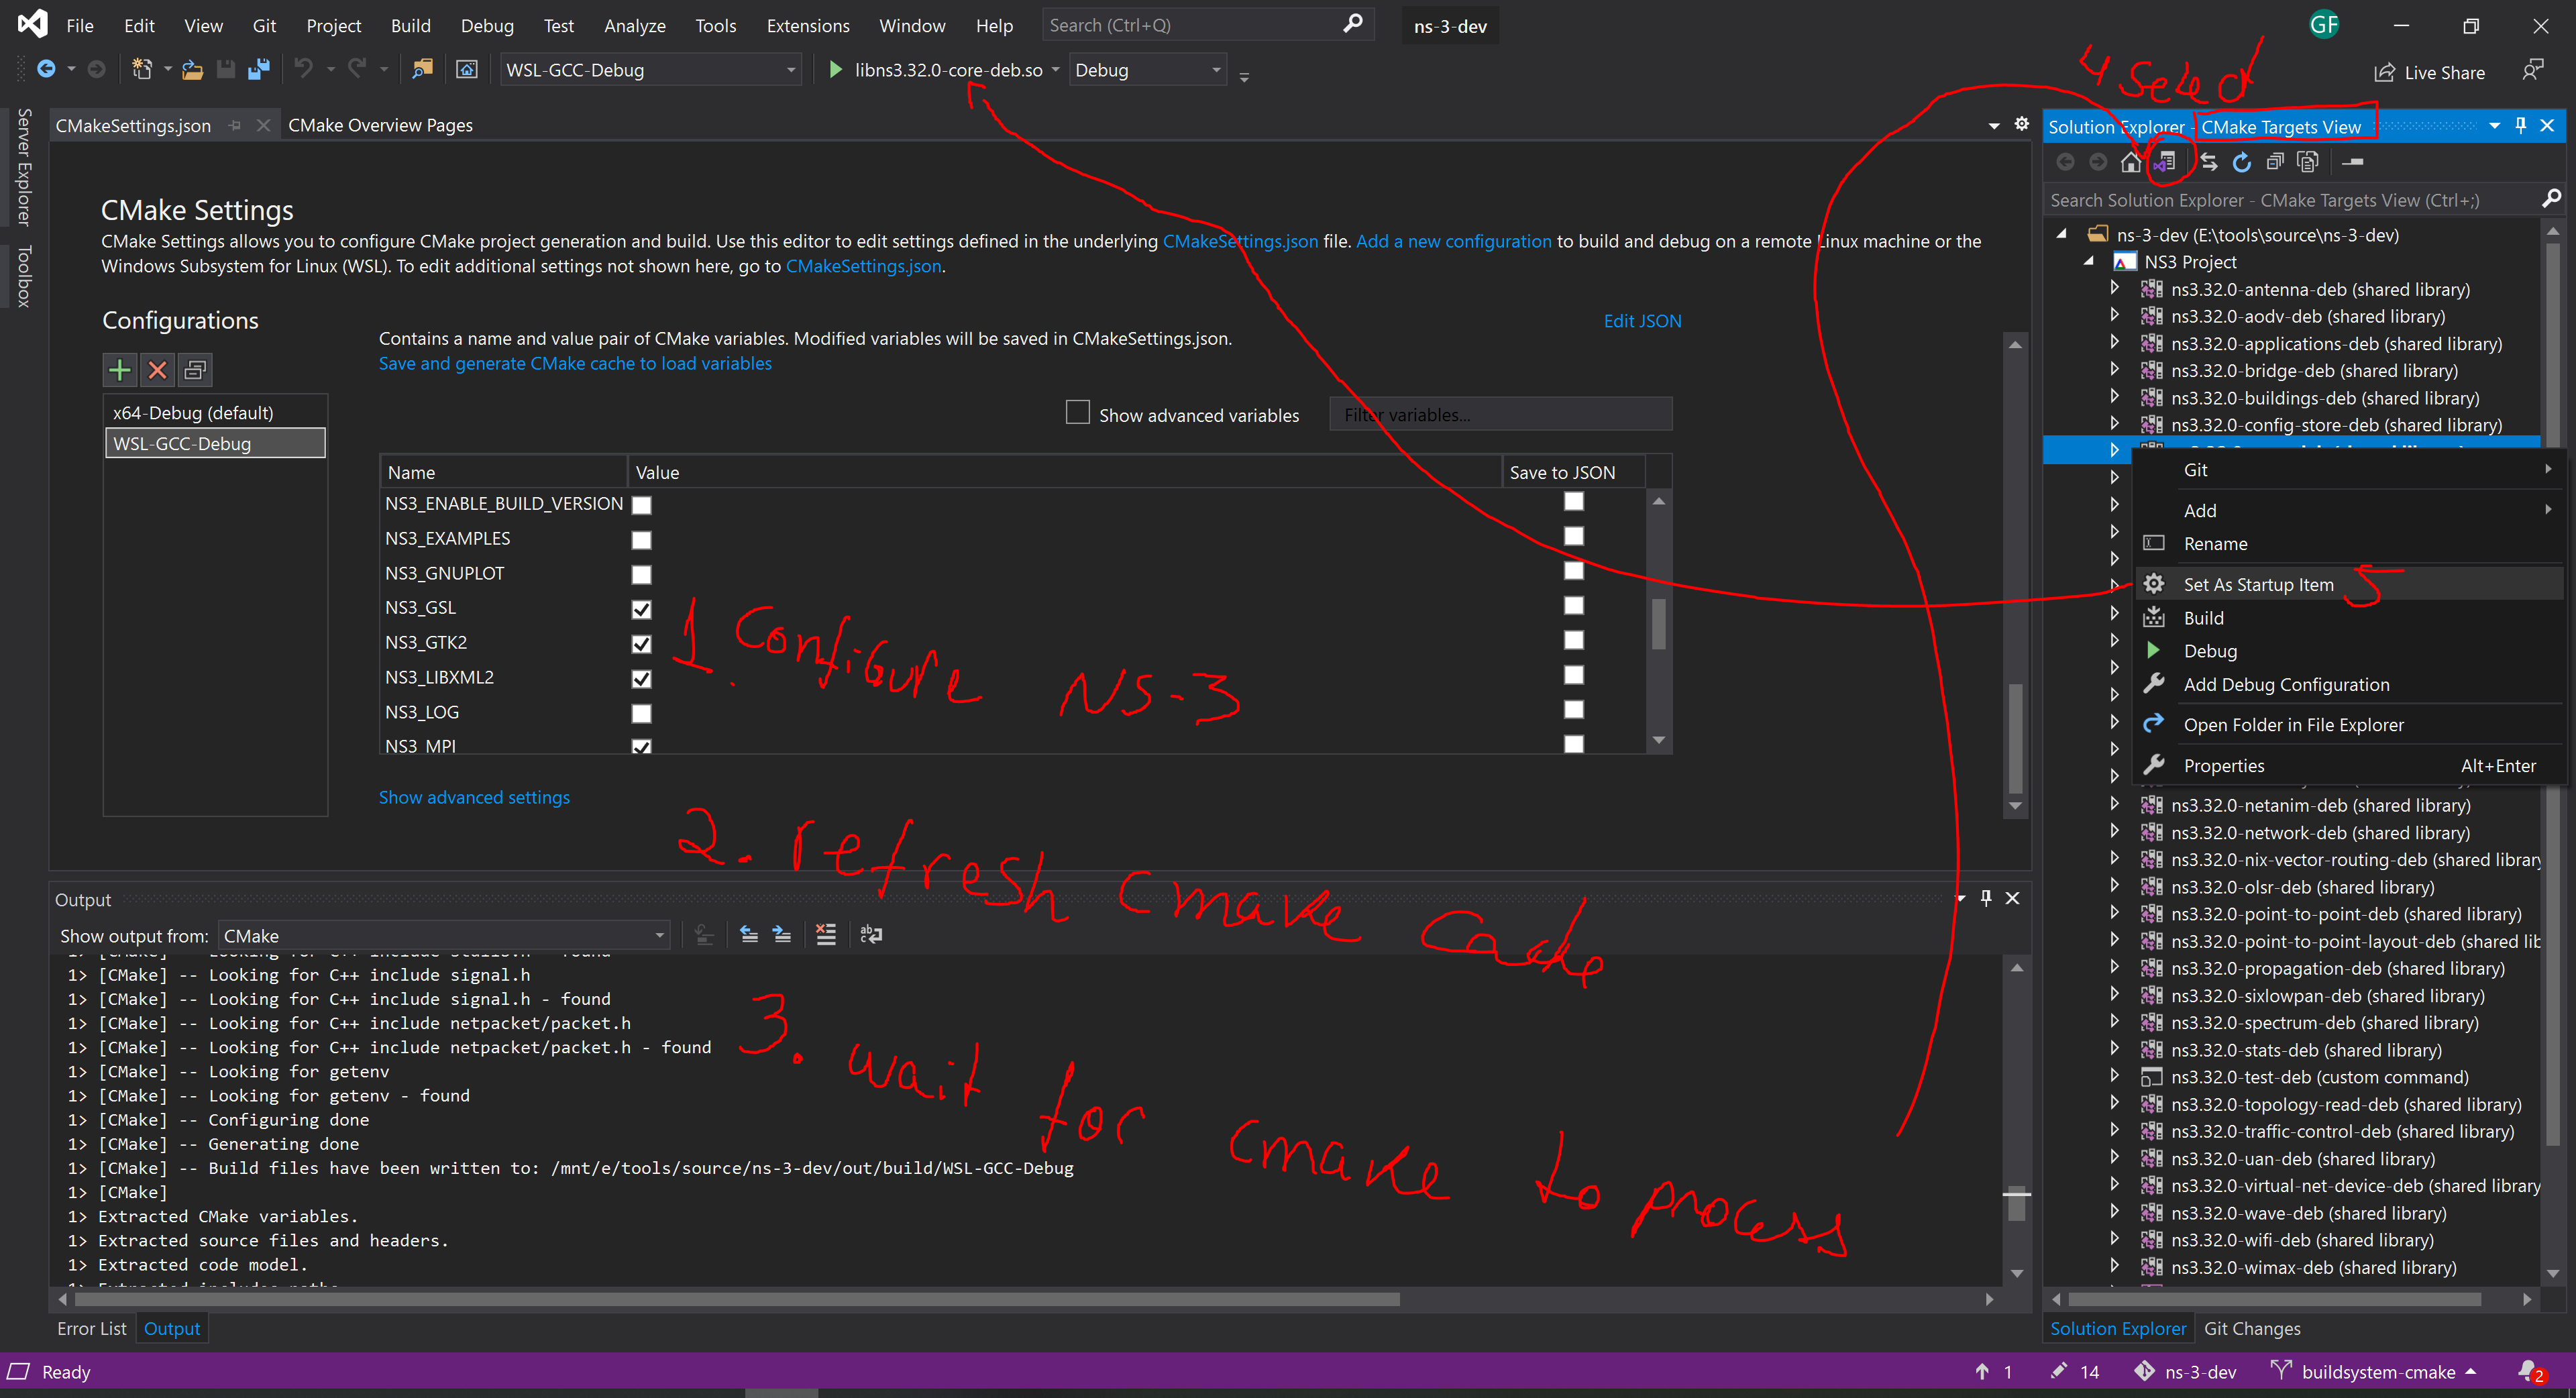
3.1.2.3 Target selection and ns-3 configuration through CMake options
Finally, you can select the CMake configurations for ns-3 and choose targets to build/debug, just like with native toolchains.
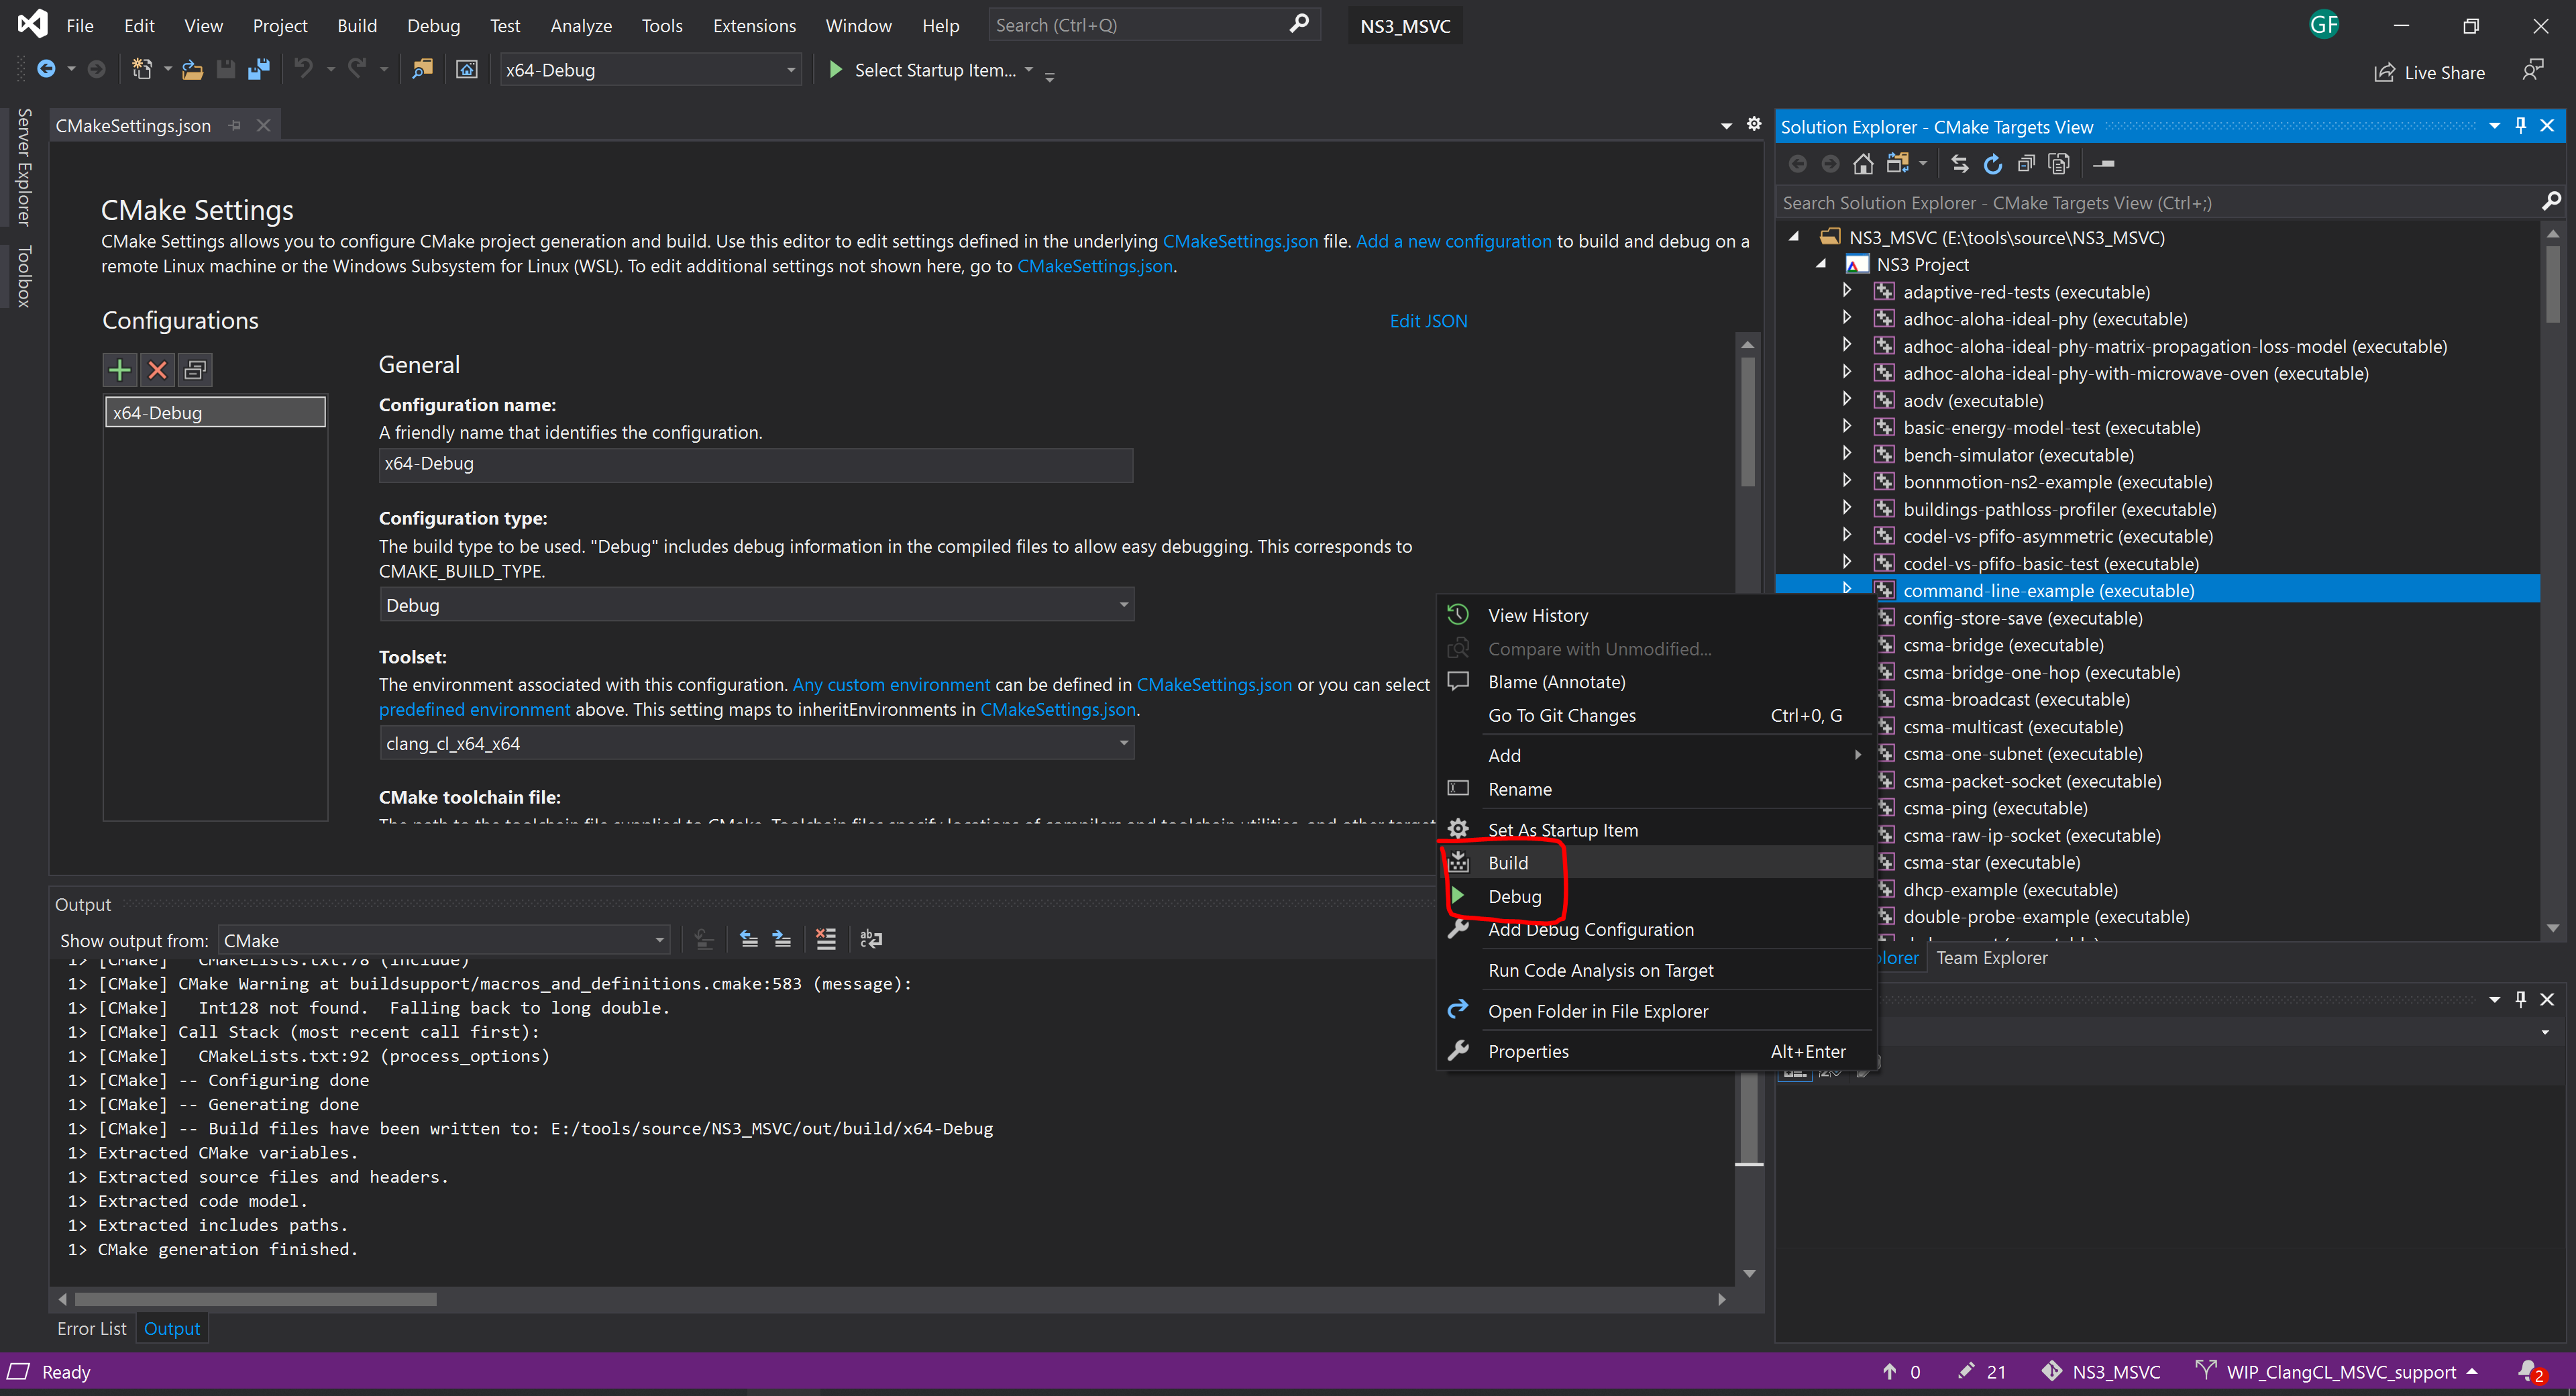
3.2 Building the project with Visual Studio
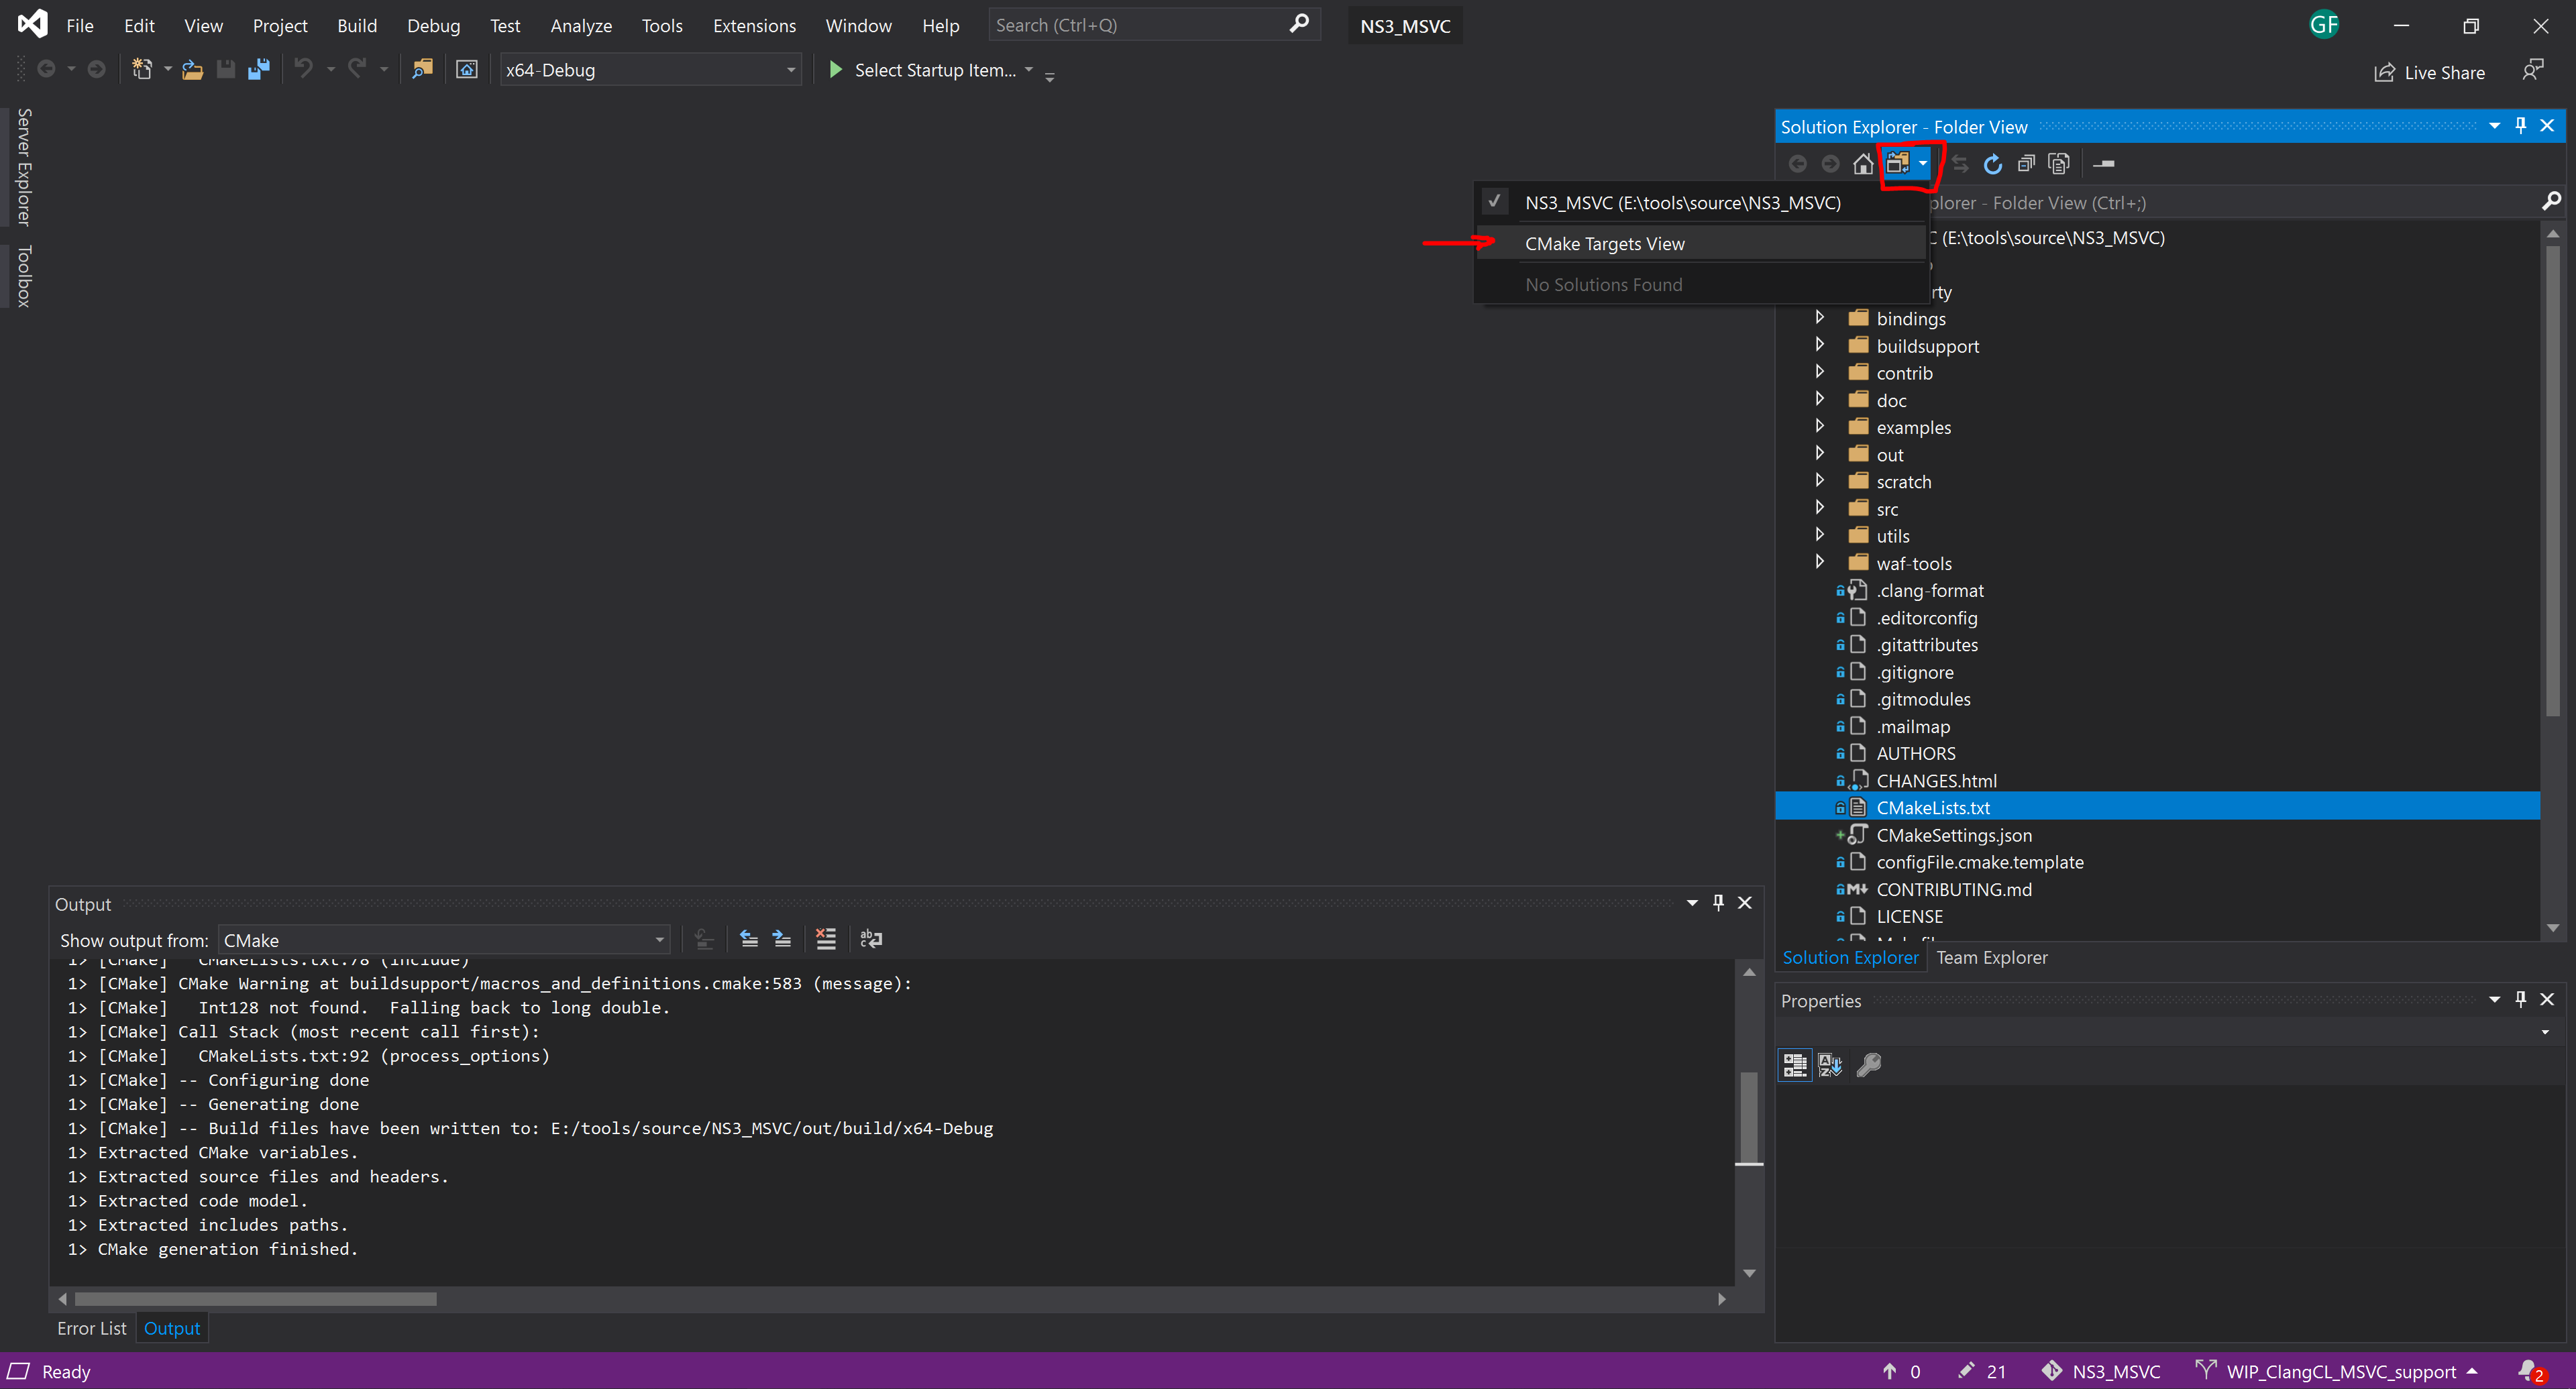
To select your target, you should switch from project files to projects view
in the solution explorer.
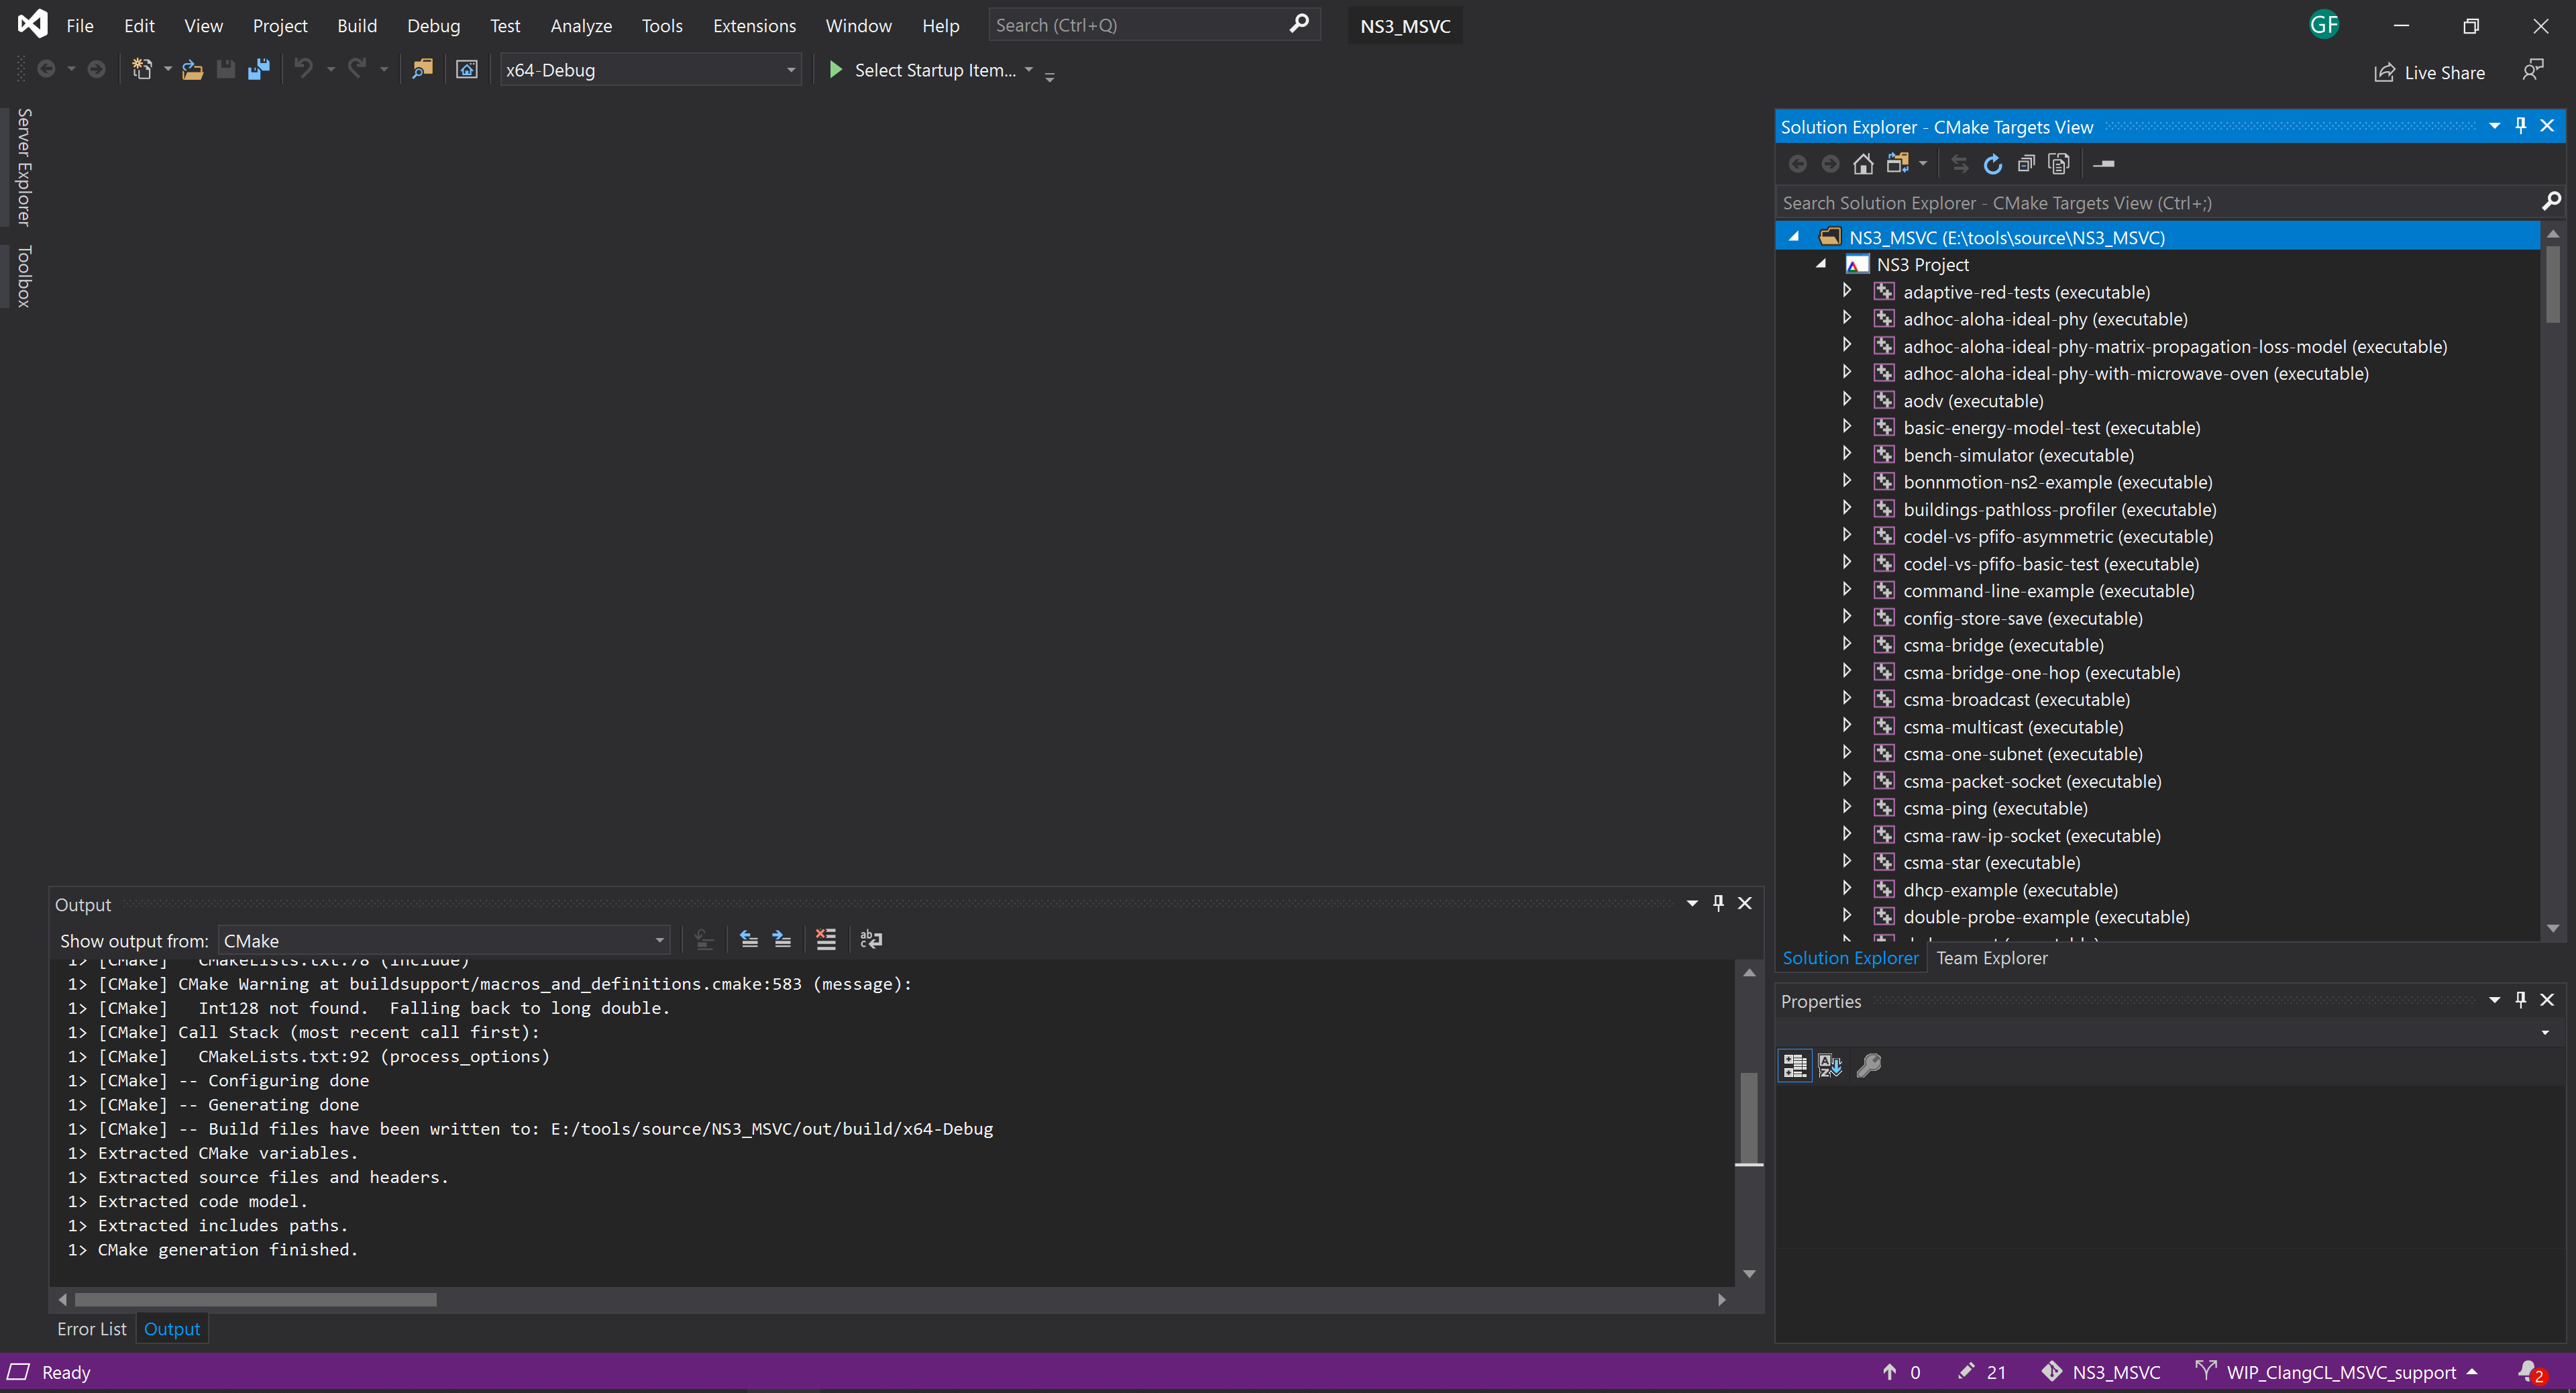
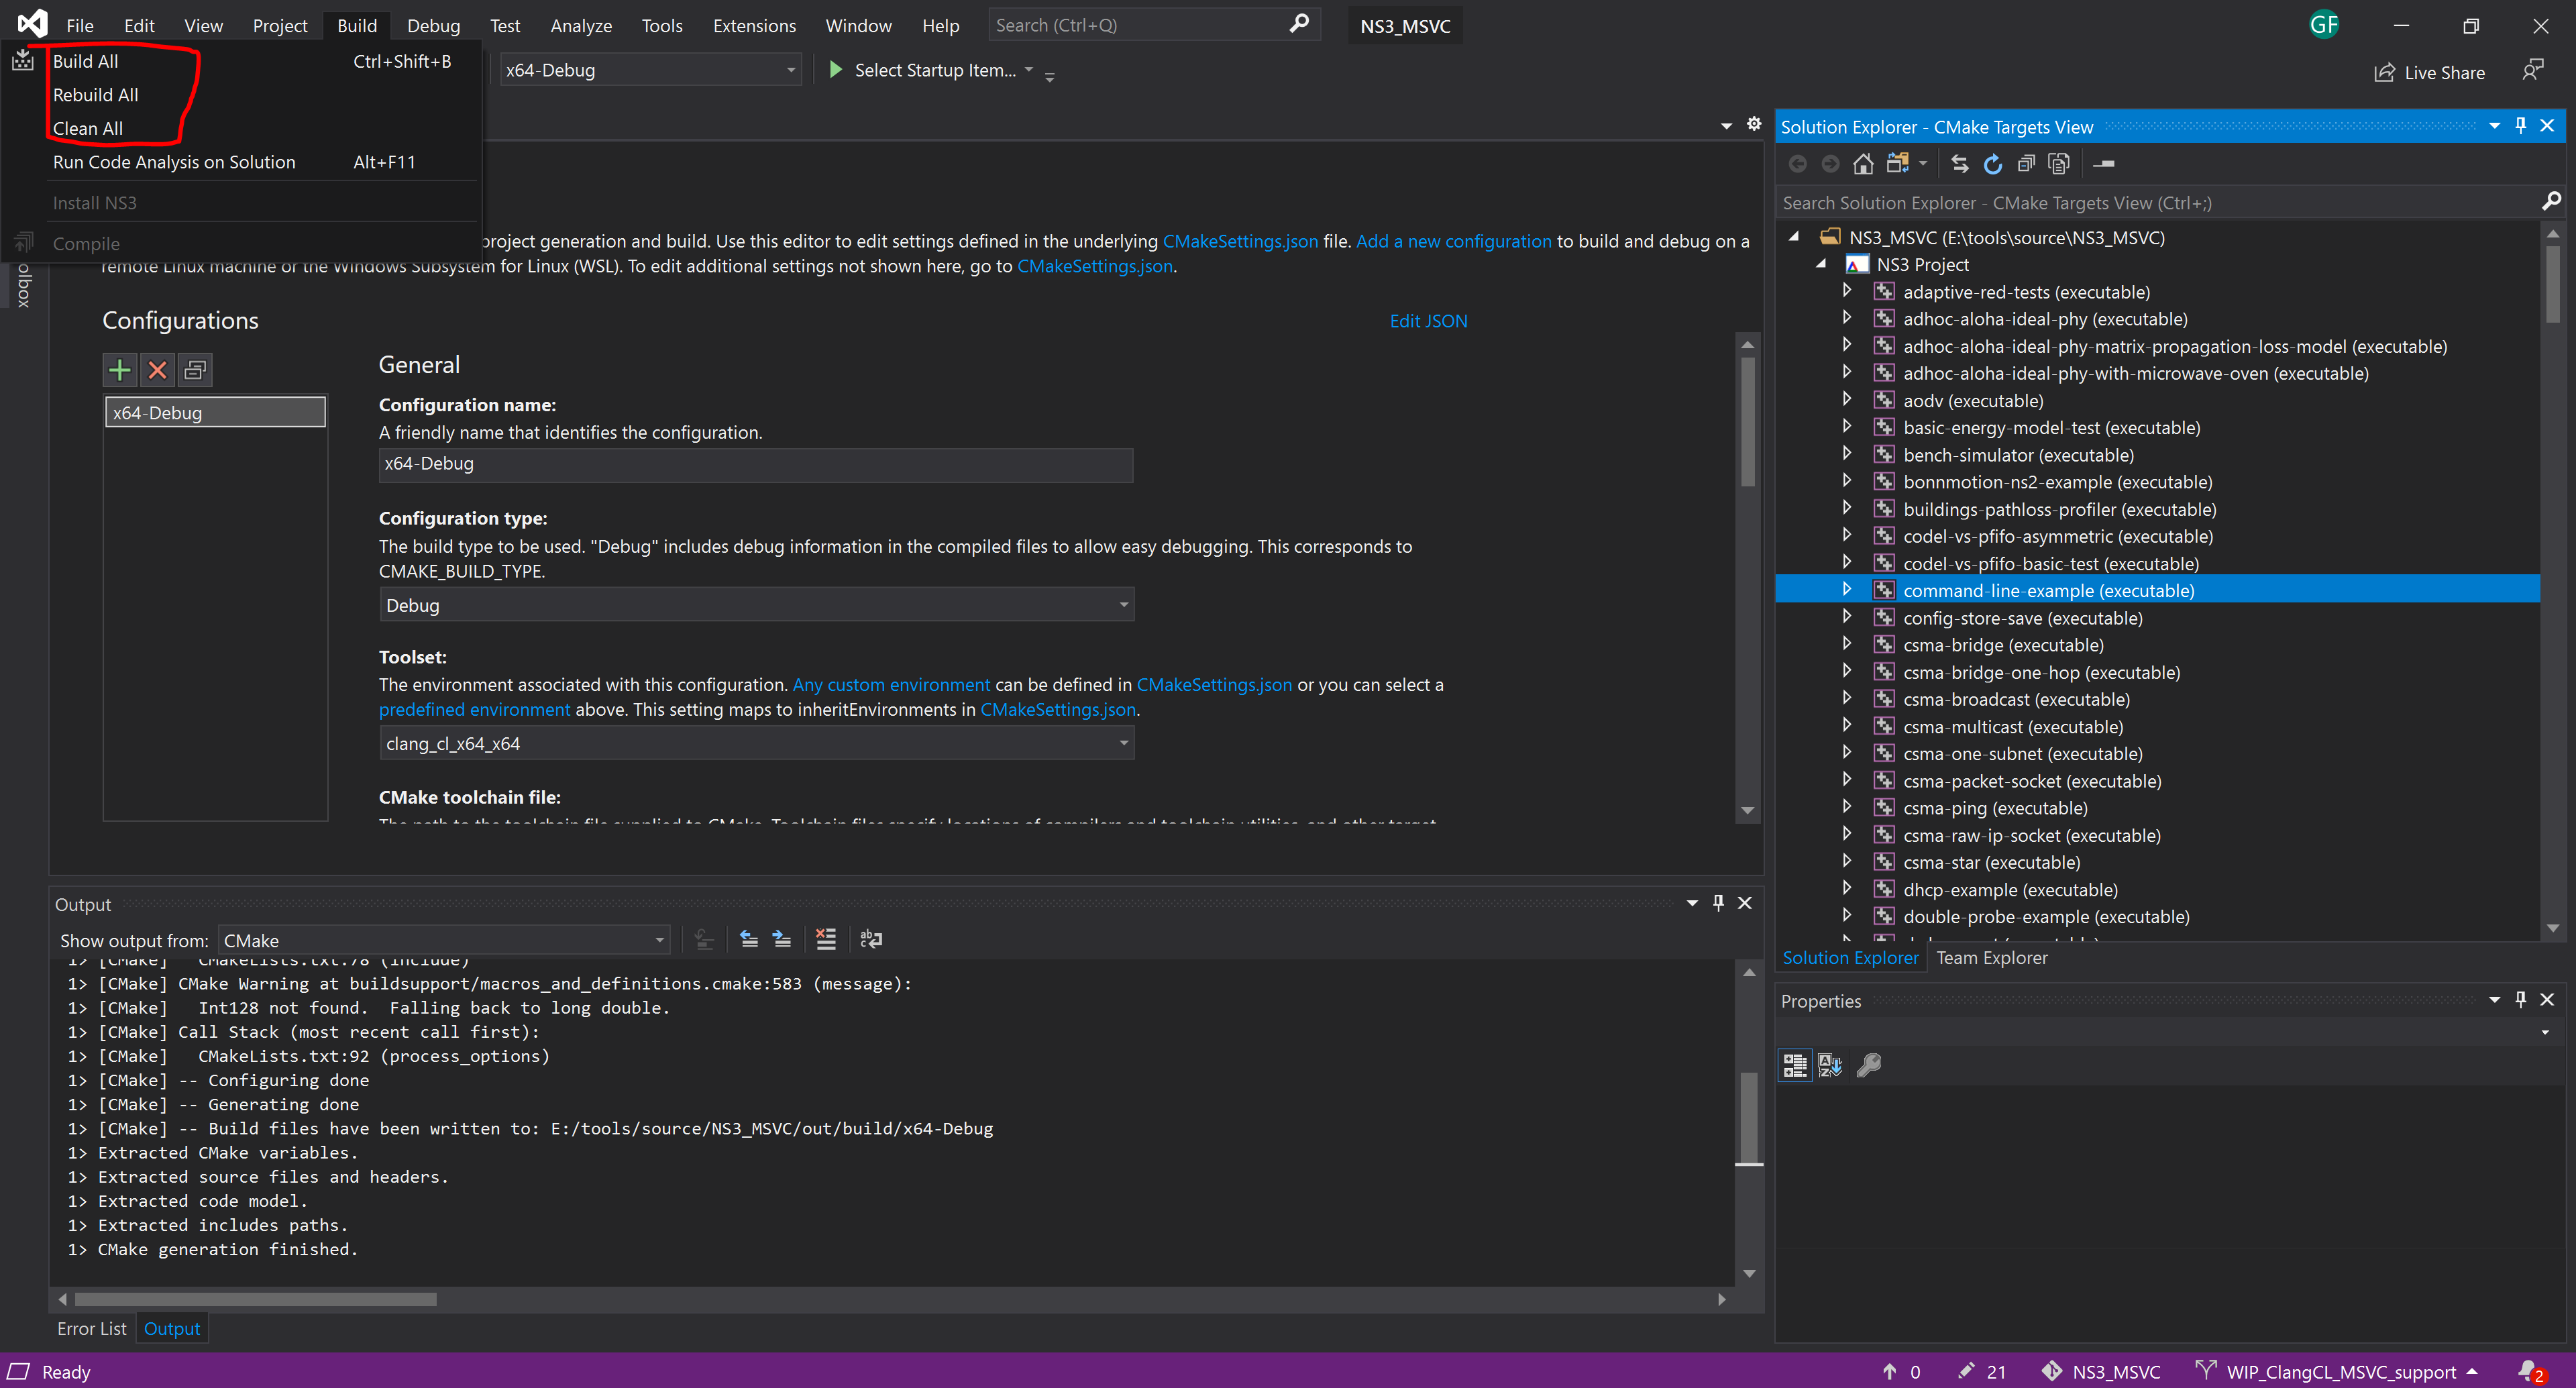
You can then click on either the play button or use the main Menu->Build->Build All.